Backup Permissions and Prerequisites
All examples below are using an account we have created specifically for backups in Active Directory called “Passwordstate Backup”. The username for this account is pback. This account is a member of the Domain Users security group only. The Windows server where SQL is installed and hosting the Passwordstate database is called dbserver01. We have a Network Share called \StorageServer01\Backups located on another server called StorageServer01. This network share is converted from a folder called C:\Data\Backups.
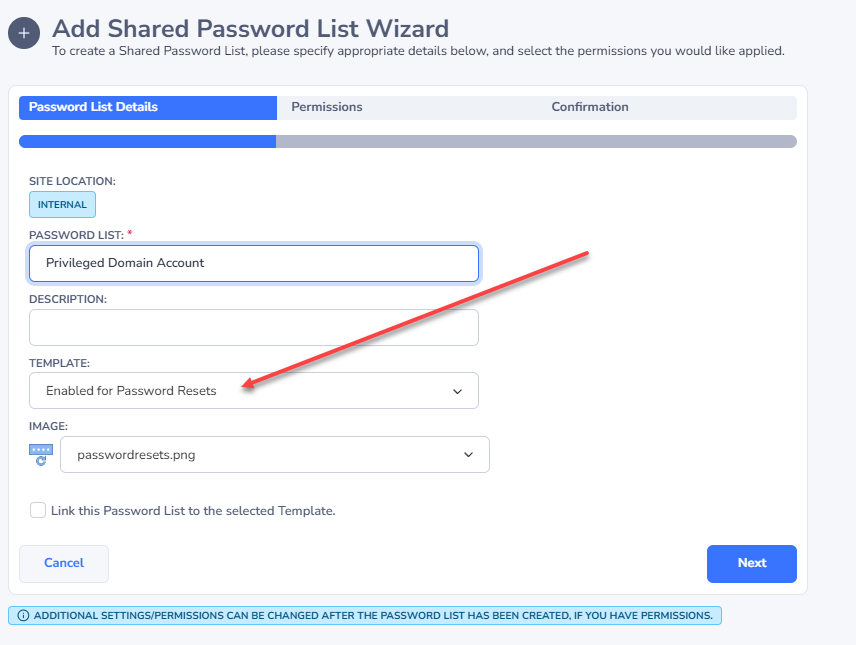
Create Password List with the Enabled for Resets Option Selected
You may already have a Password List that is enabled for resets, but if you don’t then you’ll need to create one. Creating a List with this option will allow you to add in a Password Record that can automatically reset and validate the Domain account you will be using for backups:
Create Password Record
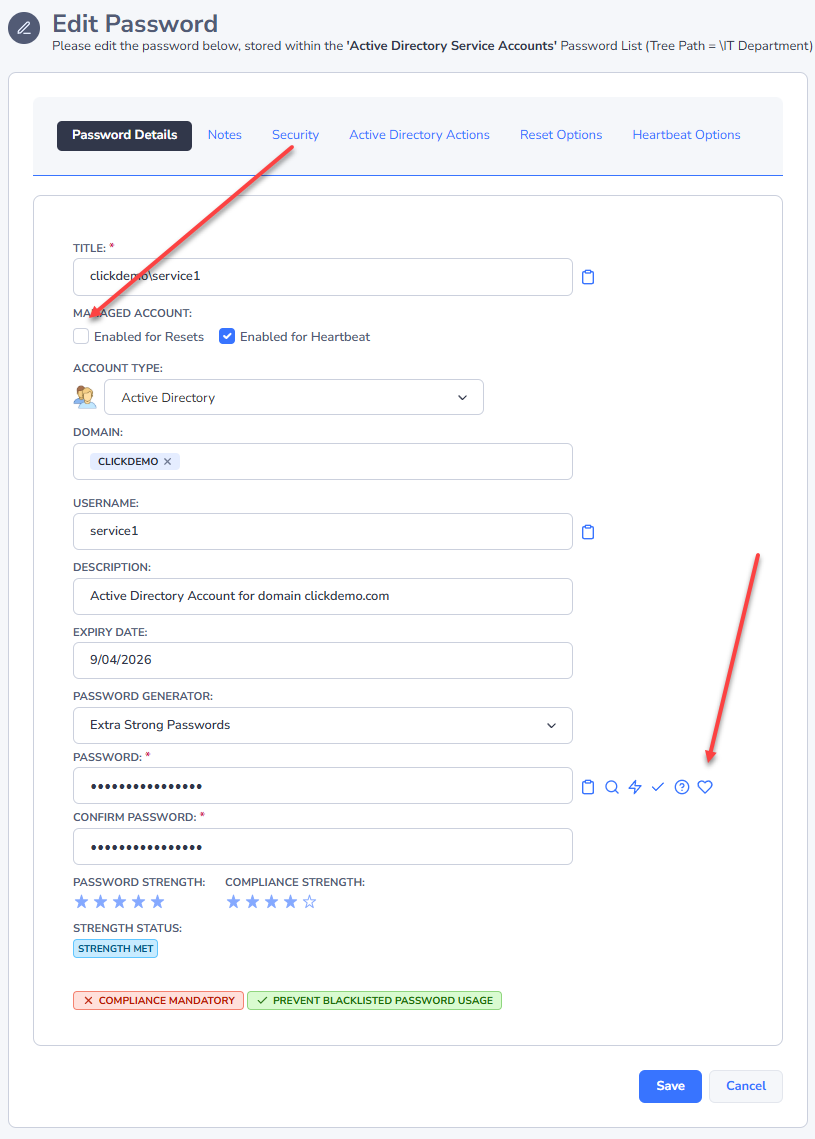
Once you have a Password List ready, you can now add in a new Password Record. When creating this record, deselect the option “Enabled for Resets”. By deselecting this option, Passwordstate will not try to automatically reset the password for the account. More information about this in the FAQ at the end of this document.
You should then choose the “Active Directory” account type, set the Domain, Username and current password for the account. You can test the password is valid by clicking the heartbeat icon.
PowerShell Requirements on Database Server
As a once off process, the SQL Server PowerShell module must be installed on your Passwordstate database server, which in this guide is dbserver01. This module can be installed by opening an elevated PowerShell ISE session on your server, and execute the following lines of PowerShell code:
Powershell
[Net.ServicePointManager]::SecurityProtocol = [Net.SecurityProtocolType]::Tls -bor
[Net.SecurityProtocolType]::Tls11 -bor [Net.SecurityProtocolType]::Tls12
Install-Module sqlserver -Scope AllUsers -Force -AllowClobber
Installing this module will reach out to some online Microsoft repositories to which you should agree to any prompts to ensure a successful install. More information about this can be found here: https://docs.microsoft.com/en-us/sql/powershell/download-sql-server-ps-module?view=sql-server-ver15
Grant Backup Account Access to the Remote Management Users Group
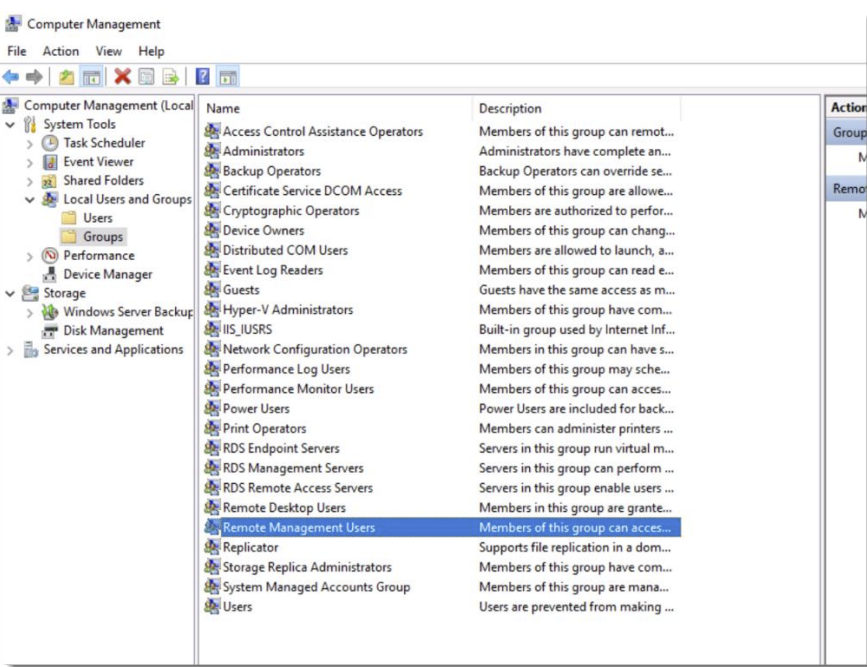
Whilst still logged into your Database Server, open Computer Management and add your backup account (pback in this example), to the Remote Management Users group. This will allow the backup account to perform Powershell connections to the Database server, which will then execute back up commands:
Share Permissions
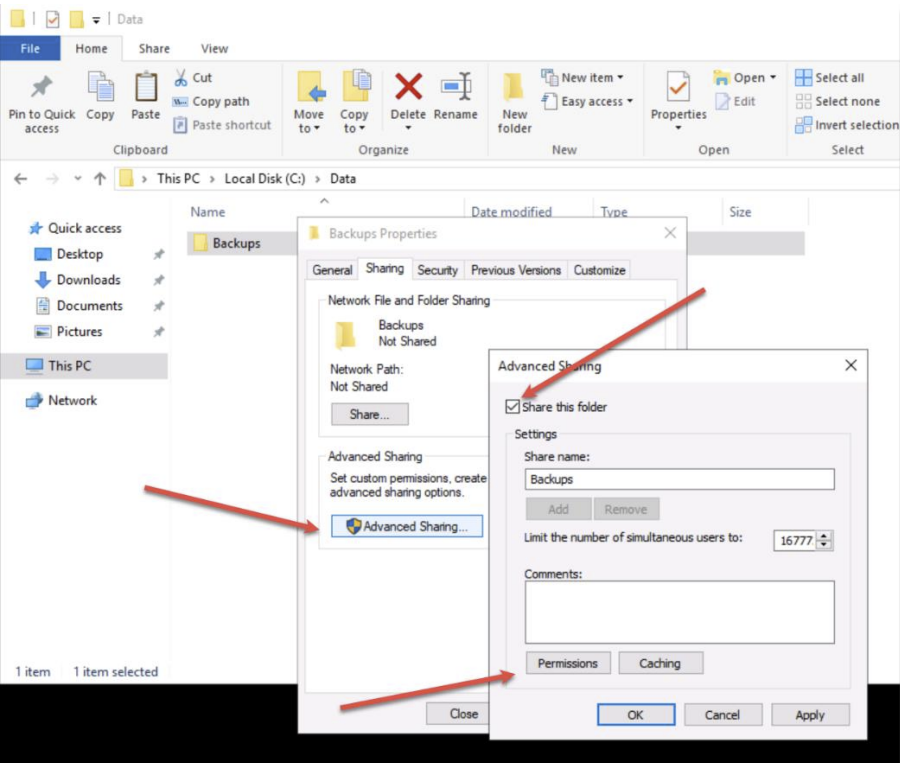
The Network Share will need the following Change permissions for the backup account, but also the SQL Server computer object. To create the Share if you haven’t already, right-click your folder and select Properties -> Sharing tab, then click Advanced Sharing. Tick the “Share this Folder” option and click the Permissions button:
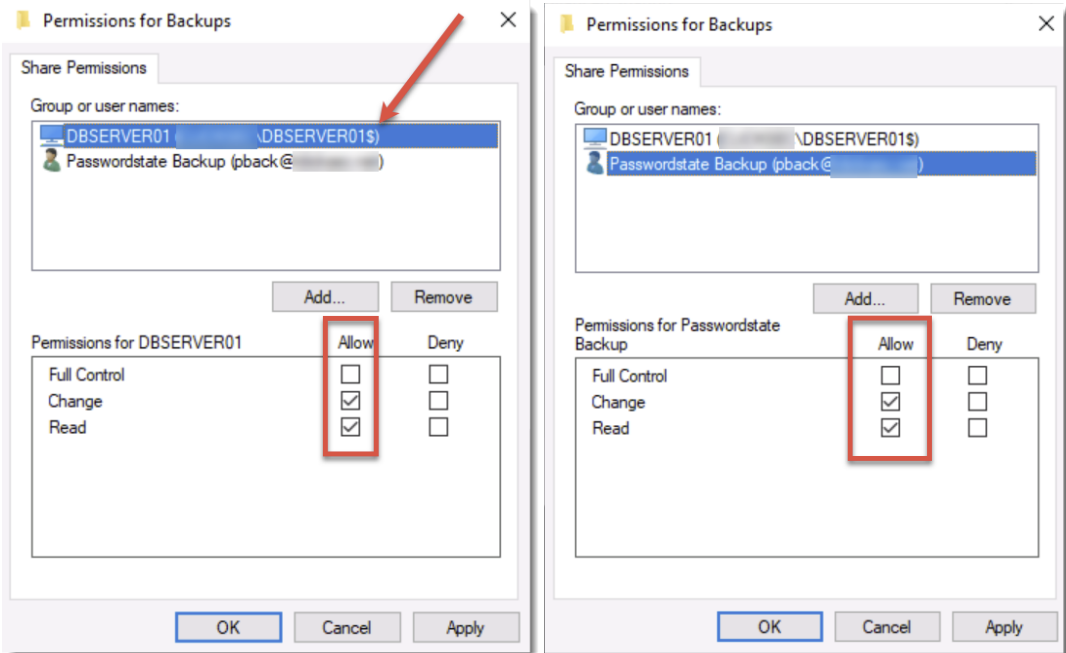
Now you should grant your backup account and the SQL Server Computer object Change access as per these two screenshots – Note, your SQL Server object will end with a $ symbol:
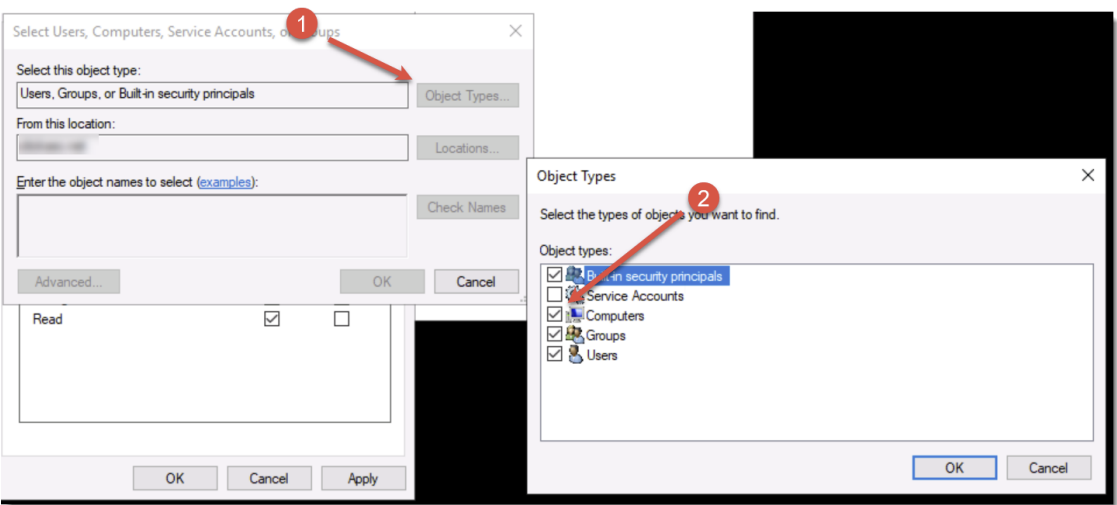
When searching for your SQL server, ensure you tick the Computer Object Type so you can find it easily:
Backup Folder Permissions
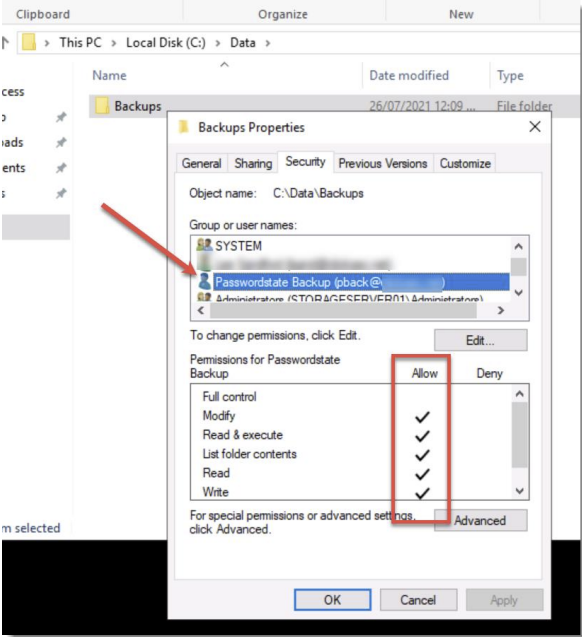
Even though you are using a Network Share, we need to grant the Backup Account Modify access to the folder that the Share is converted from. This is due to the way we impersonate the account when performing the backup operations:
SQL Database and Server Permissions/Requirements
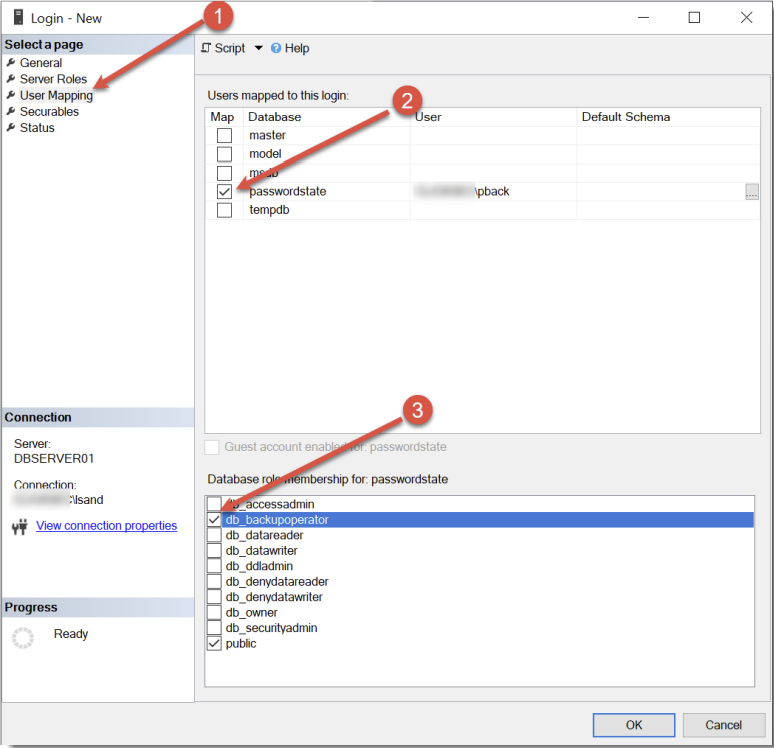
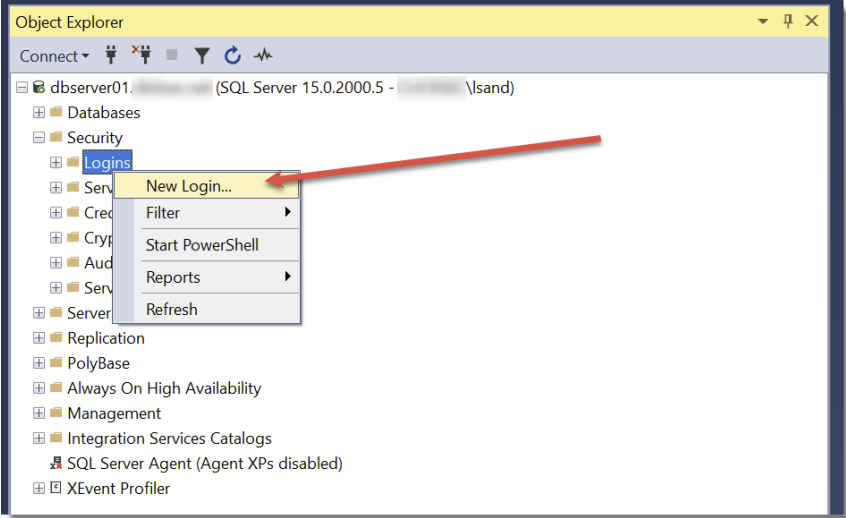
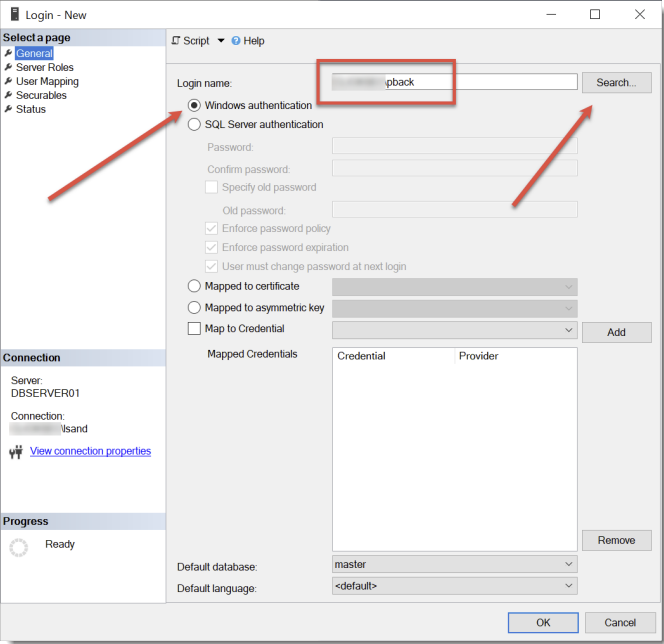
Using SQL Management Studio tools, connect to your database server with any SQL admin account of your choice, and add in the backup account user under Security -> Logins. When adding this user, ensure you give it db_backupoperator permissions to the Passwordstate database:
Screenshot #1:
Screenshot #2
Screenshot #3