
SQL Server Basic Availability Groups Installation
Instructions to install SQL Server Basic Availability Groups.
Please note these instructions are only a guide. If you have issues installing or using SQL Server, please refer to Microsoft's documentation.
Overview
This document will provide instructions for configuring SQL Server Basic Availability Groups for High Availability of the Passwordstate Database. These instructions are created using SQL Server 2017 standard edition and are intended as a guide only. If you have any technical issues with SQL Server, please contact Microsoft for support. Please also be aware of the following SQL Server Limitations with Basic Availability Groups, as per Microsoft’s documentation:
- Limit of two replicas (primary and secondary)
- No read access on secondary replica
- No backups on secondary replica
- No integrity checks on secondary replicas
- No support for replicas hosted on servers running a version of SQL Server prior to SQL Server 2016 Community Technology Preview 3 (CTP3)
- Support for one availability database
- Basic availability groups cannot be upgraded to advanced availability groups.
- Basic availability groups are only supported for Standard Edition servers.
- Basic availability groups cannot be part of a distributed availability group.
- You may have multiple Basic availability groups connected to a single instance of SQL Server.
Prerequisites
The Following are some pre-requisites to installing and configuring SQL Server for Basic Availability Groups:
- You will need to have SQL Server 2016 (or above) Standard installed on two separate servers with the default instance set, and the default Port of 1433 configured. Neither of the machines that host SQL can be a domain controller.
- You’ll also need one domain service account with “domain users” permissions on your network
- Passwordstate should be installed and communicating to a database on one of your SQL servers you have set up for this exercise
- A network share that Always On technology requires for database backups
- Your Passwordstate SQL database Recovery Model must be configured as “Full”. Below is some information about a test environment used to document this process, to help you understand our instructions easier:
SQLDB1.halox.net - 10.0.0.146
- Microsoft Windows 2016 Server with SQL 2017 Standard installed
- Also hosts Passwordstate database
SQLDB2.halox.net – 10.0.0.147
- Microsoft Windows 2016 Server with SQL 2017 Standard installed
Win2k16installs.halox.net - 10.0.0.120
- Passwordstate web server
Domain privileged account:
- halox\sqlservice
Passwordstate SQL account:
- passwordstate_user
Network Share:
\\SQLDB1\Backups- halox\sqlservice has full permissions to this share
Configure SQL Services
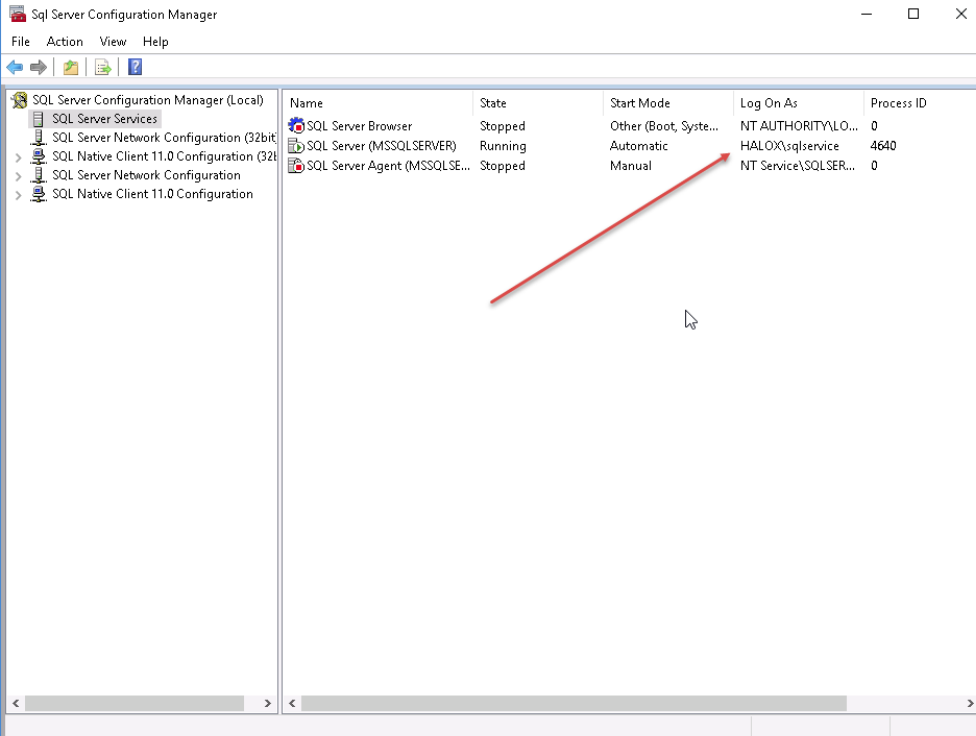
Confirm you have set your SQL Server service on both SQLDB1 and SQLDB2 to run under your domain account:
- Open SQL Server Configuration Manager and edit the properties of the SQL Server service, setting your domain account under the Log On tab.
Install Windows Fail over Cluster Role
On both SQLDB1 and SQLDB2, install the Fail over Cluster role by following this process:
- Open Server Manager
- Select Add Roles and Features
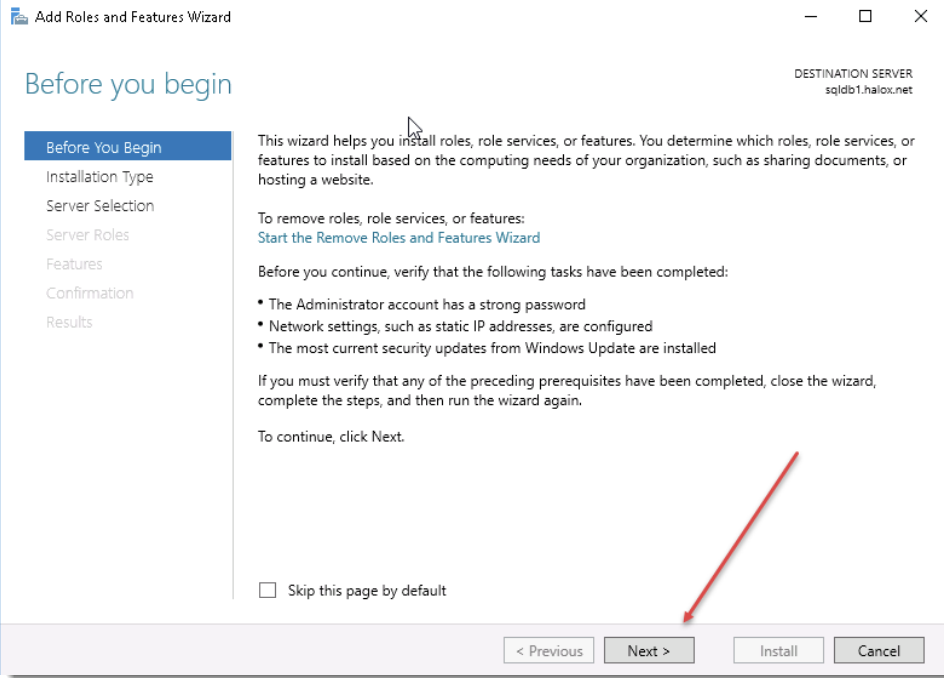
- At the Before you Begin Page, select Next
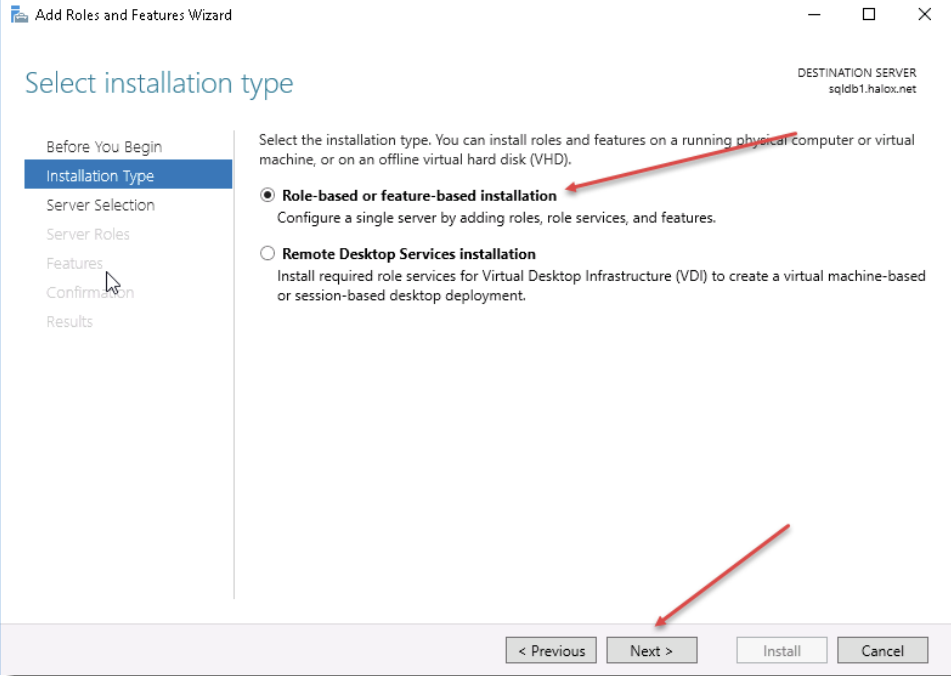
- Select Role-based or feature-based installation and click Next
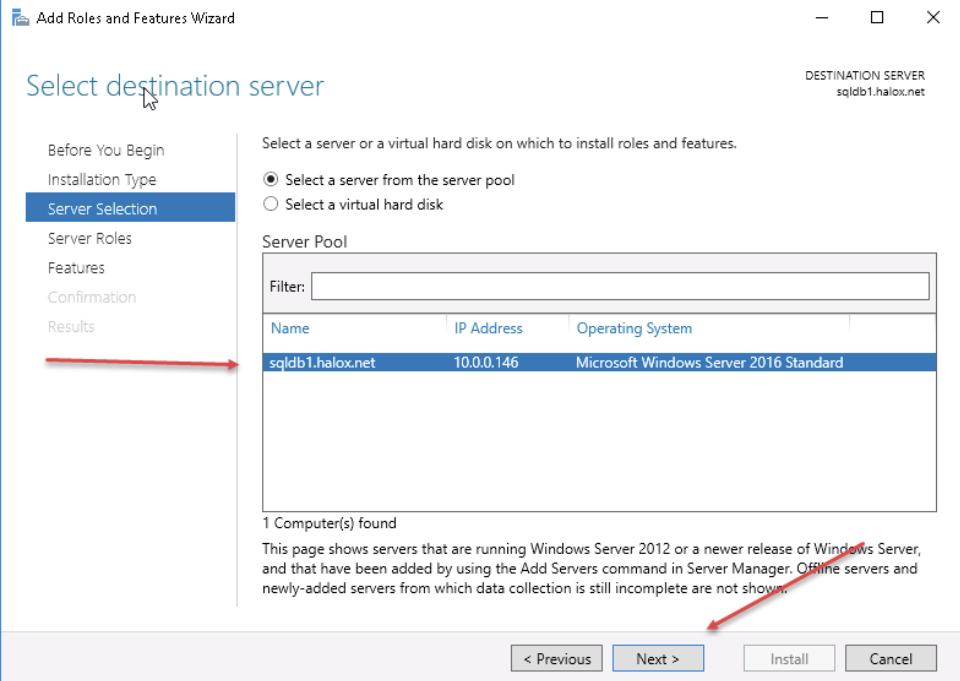
- Select your server and click Next
- Leave the defaults and click Next
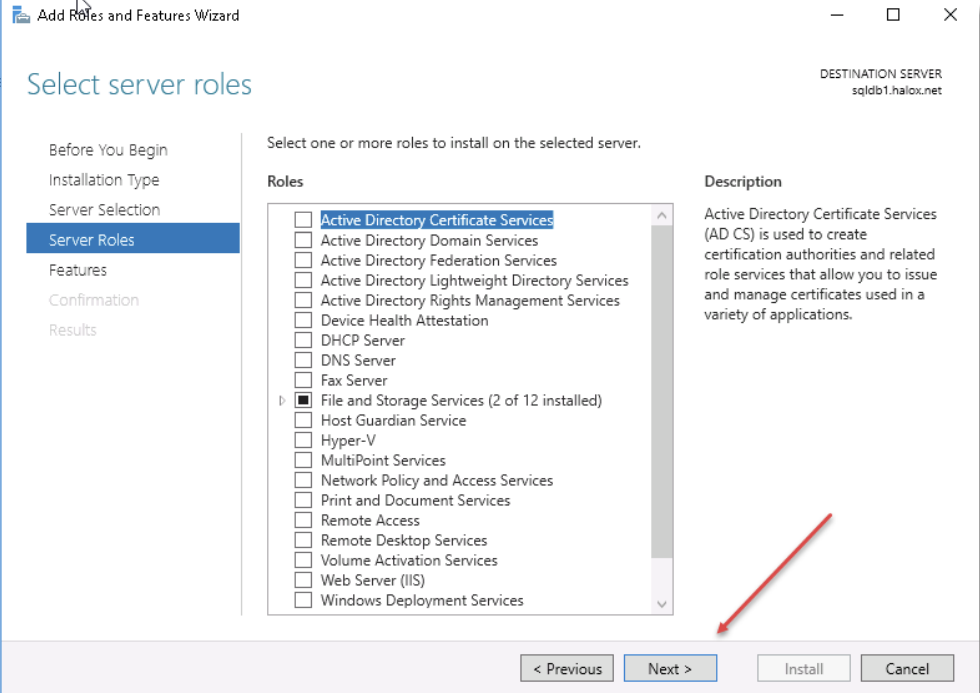
- Tick Fail over Clustering, Select Include Management Tools, Click Add Features and then click Next
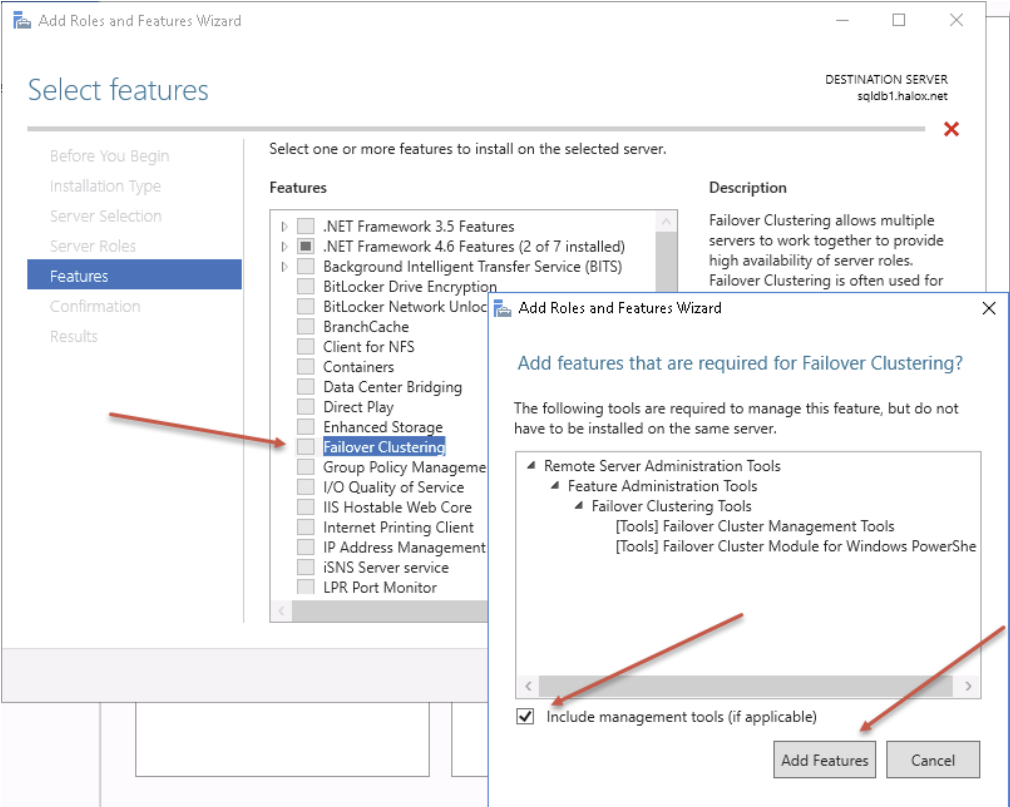
- Click Install
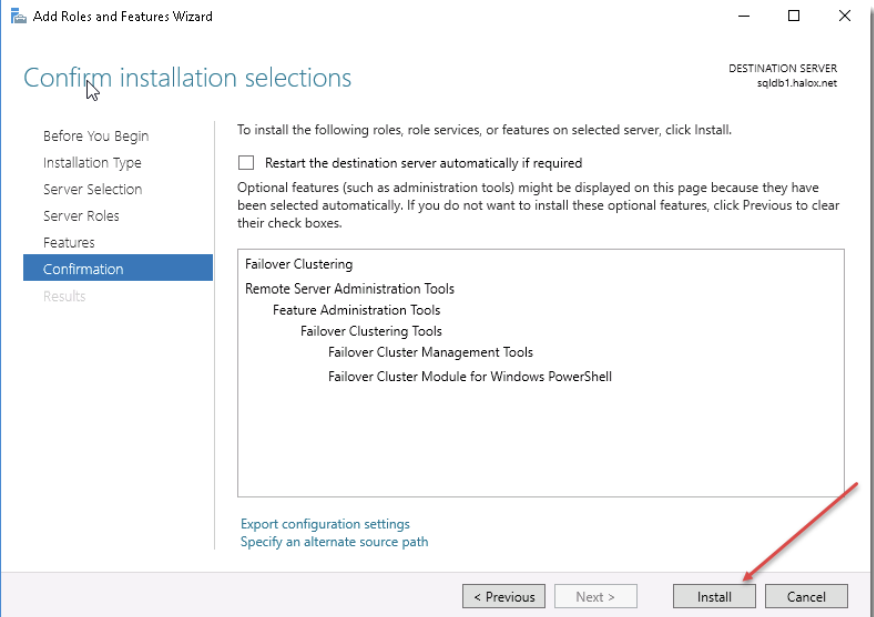
- When the installation has finished, reboot the server
- Ensure you repeat this process on both servers
Set up the Fail over Cluster (WSFC)
Set up a Windows Server Fail over Cluster which includes both SQLDB1 and SQLDB2. To do this:
- On SQLDB1, open Server Manager
- Go to Tools -> Fail over Cluster Manager
- Right click Fail over Cluster Manager and select Create Cluster:
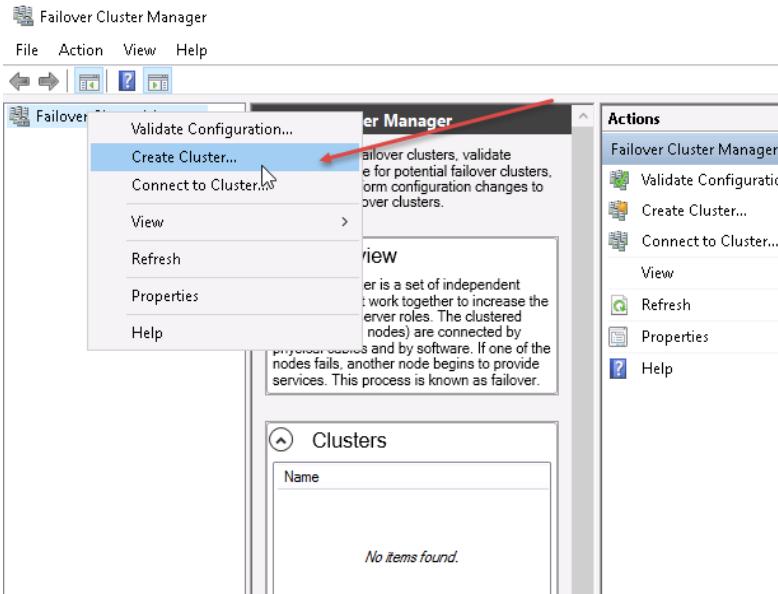
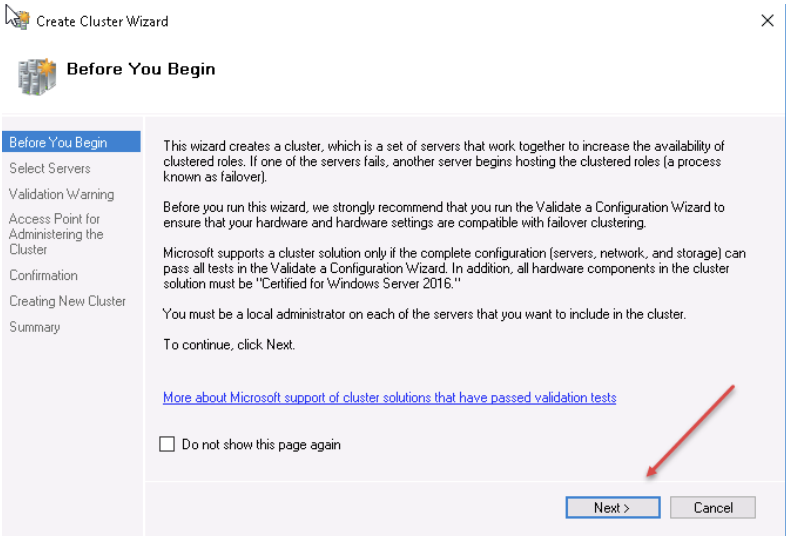
- Select Next
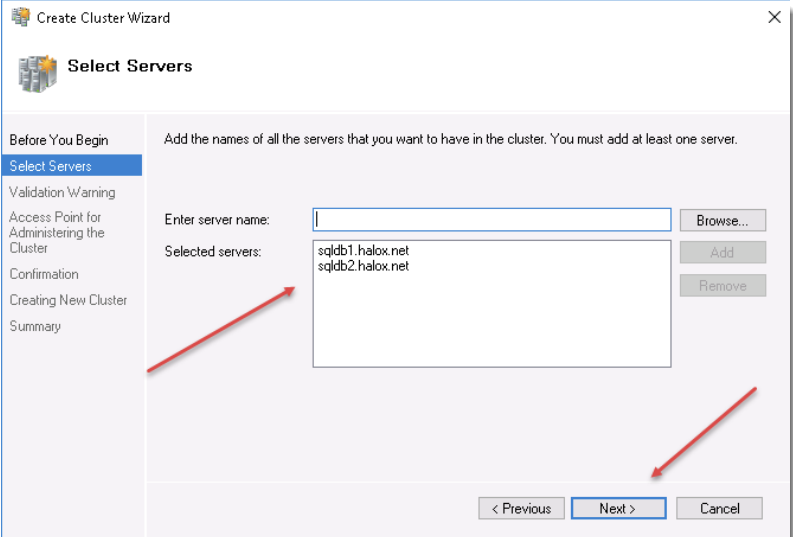
- Add SQLDB1 and SQLDB2 and click Next
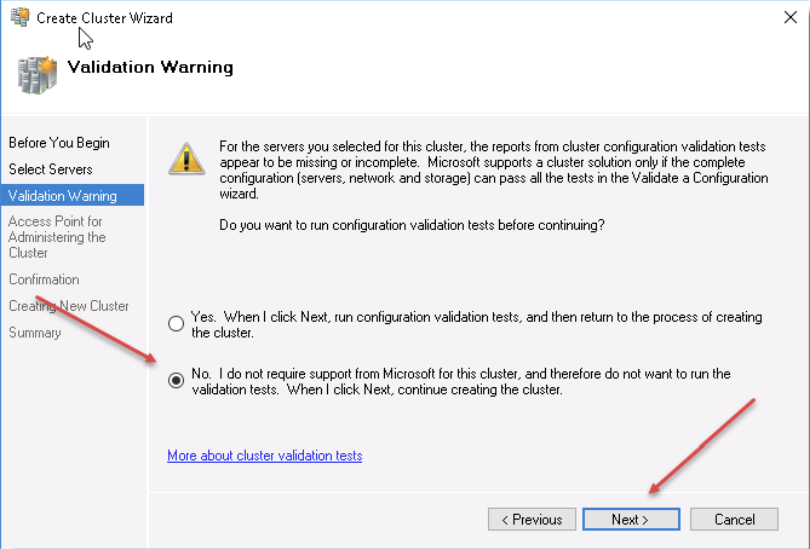
- Click No to running the validation tests and click Next
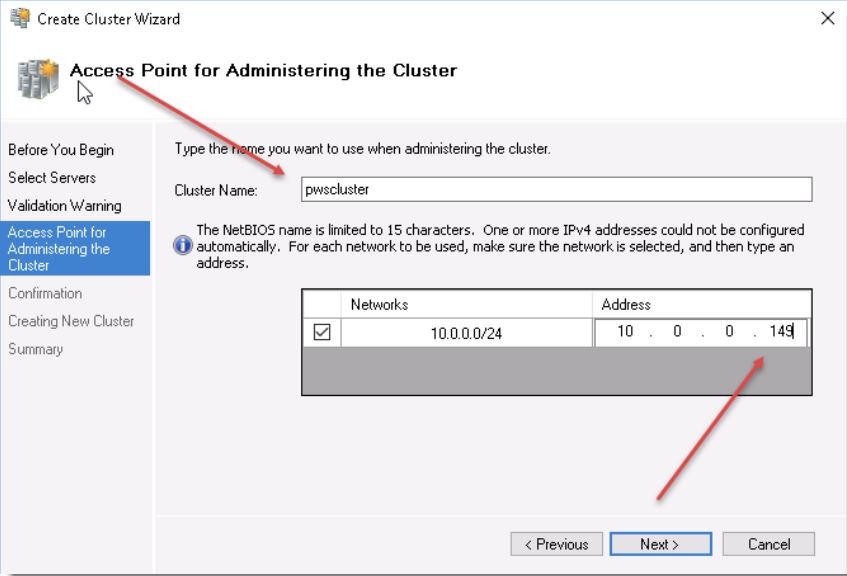
- Add in the name of your cluster and the static IP Address it will be assigned. This will create a virtual computer object in Active Directory and a Host entry for this object in DNS.
- Click Next
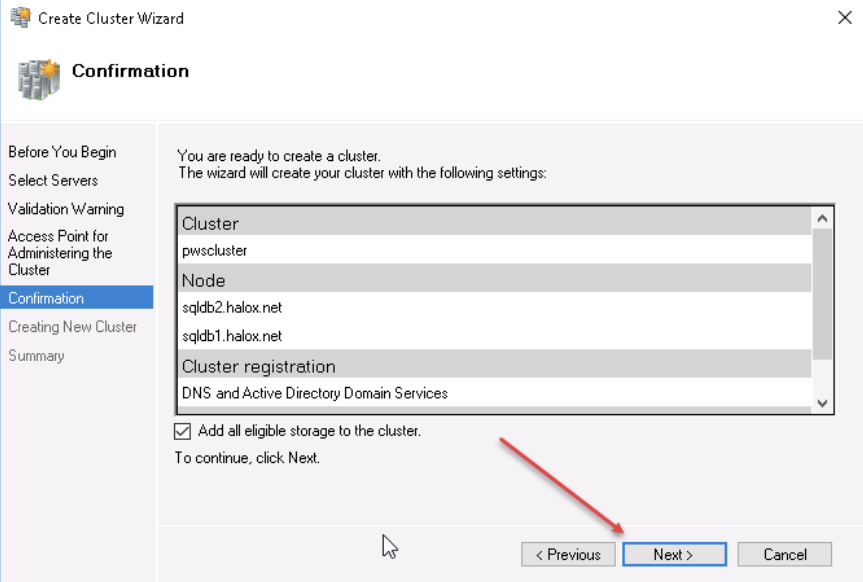
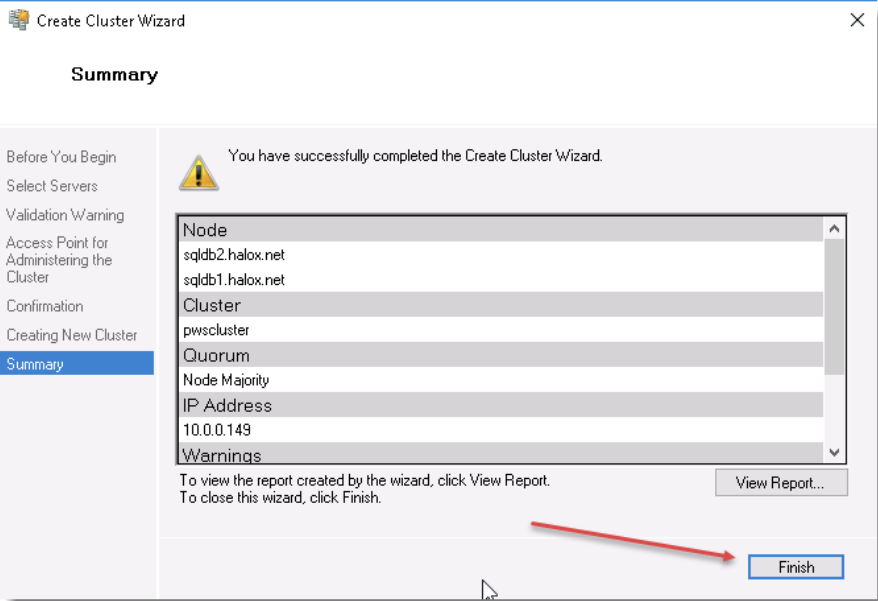
- Click Finish
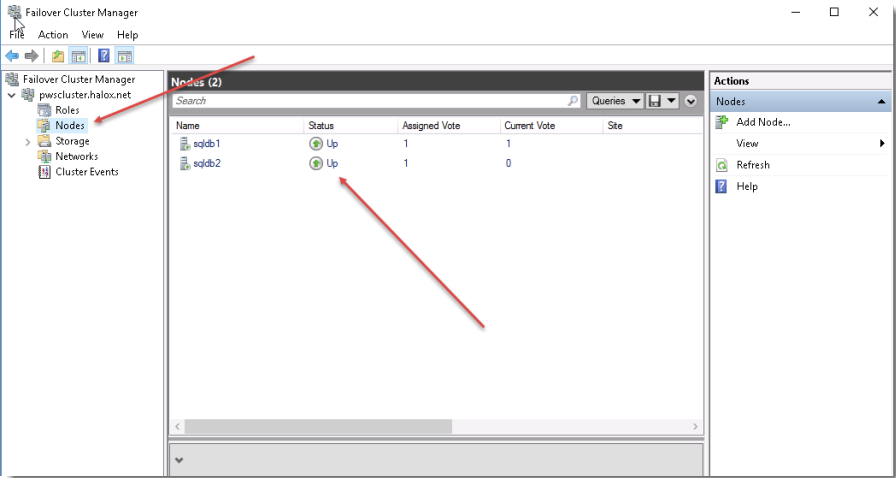
- This process will automatically create the cluster on SQLDB2, so if you log into any of your database servers now, you will see the cluster has been created, and both nodes are Up:
Enable AlwaysOn Availability Groups
To enable AlwaysOn Availability Groups in SQL, perform the following steps on both SQLDB1 and SQLDB2
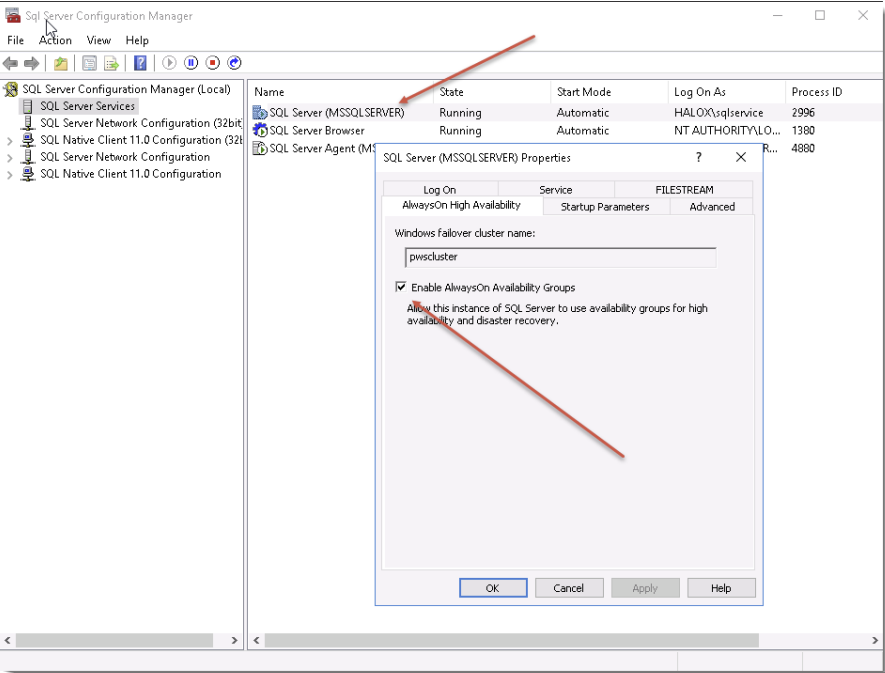
- Open SQL Server Configuration Manager, go to the properties of the SQL Server service, and tick the Enable AlwaysOn Availability Groups option. Click OK to the warning about the services needing to be restarted.
- Restart the SQL Service service on both servers after making this change
Configure Basic Availability Groups
We will now create a Basic Availability Group which will automatically failover to a working database in the event one of them become unavailable. This process will create the Availability Group on both SQL servers, and it will synchronize your Passwordstate database between them.
It will also create a Listener, which is a virtual computer object in Active Directory. This will be used in Passwordstate to ensure your website is always available.
- On SQLDB1 open SQL Management Studio Tools
- Right click Always On High Availability and launch the New Availability Group Wizard
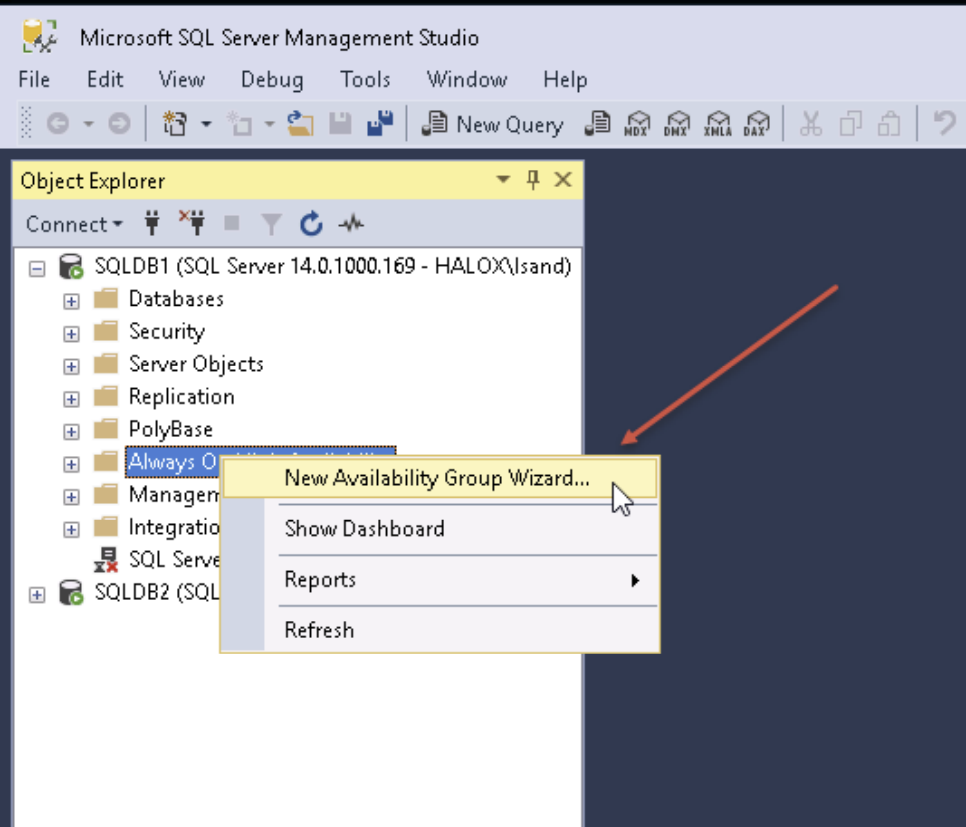
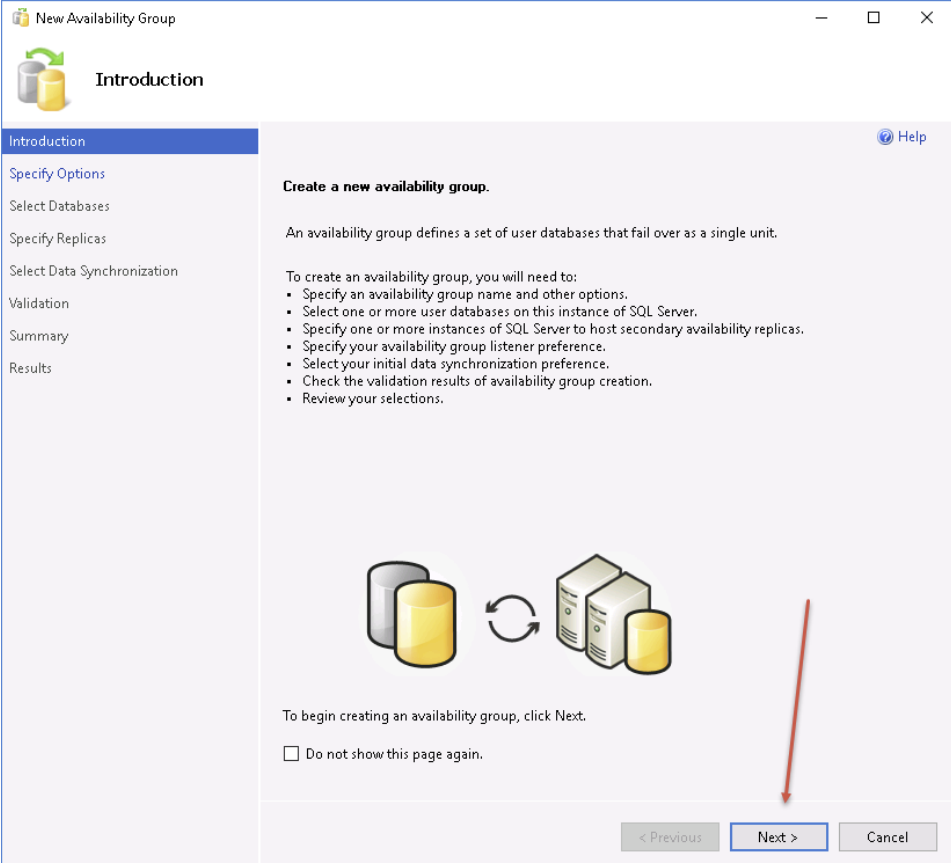
- Click Next
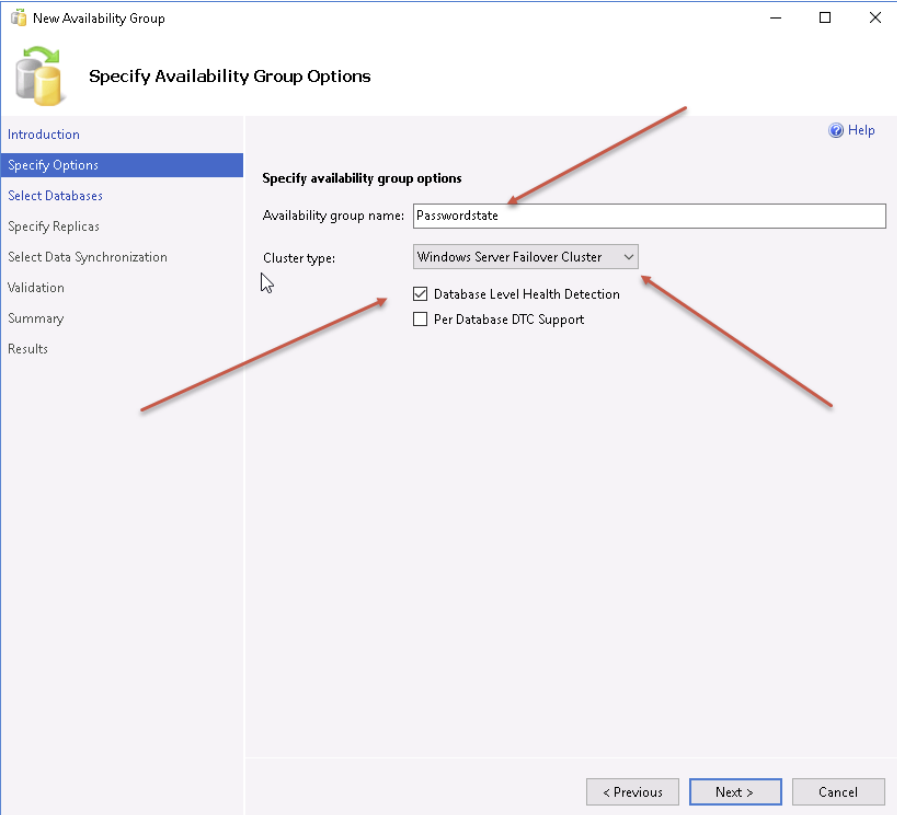
- Type in a name of the Availability Group as Passwordstate, select the Cluster Type as Windows Server Fail over Cluster, and tick the option for Database Level Health Detection. Click Next. (Note, on older versions of SQL you may need to tick a box on this screen called ‘Basic Replication’)
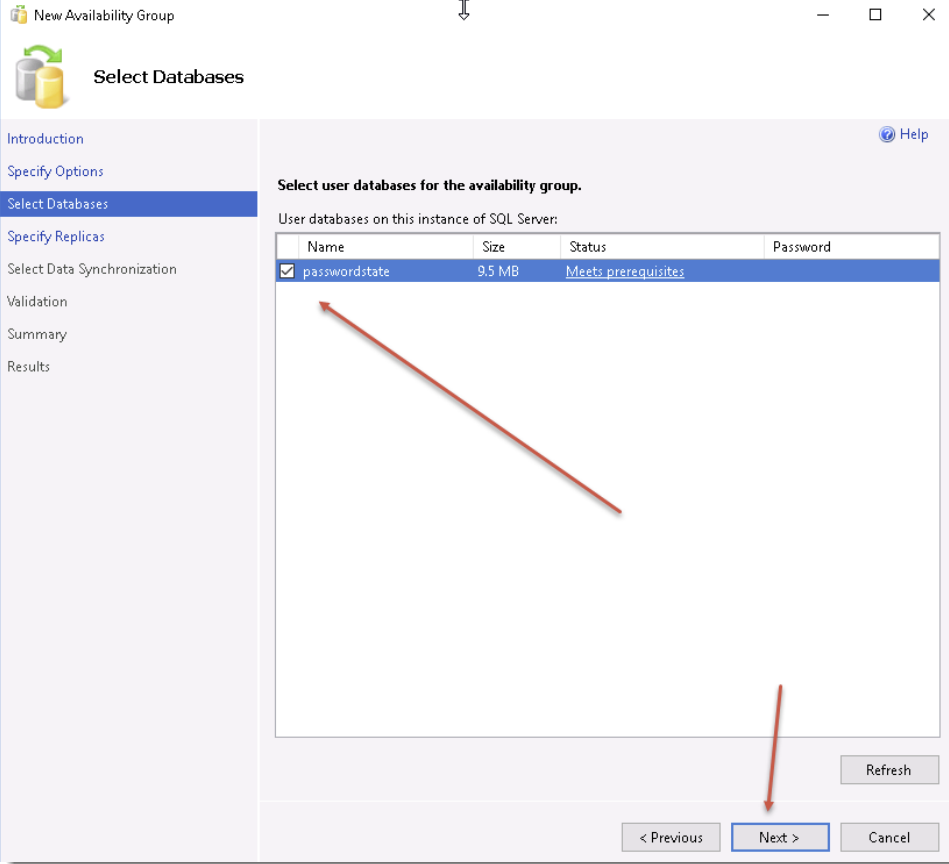
- Tick the Passwordstate database and click Next:
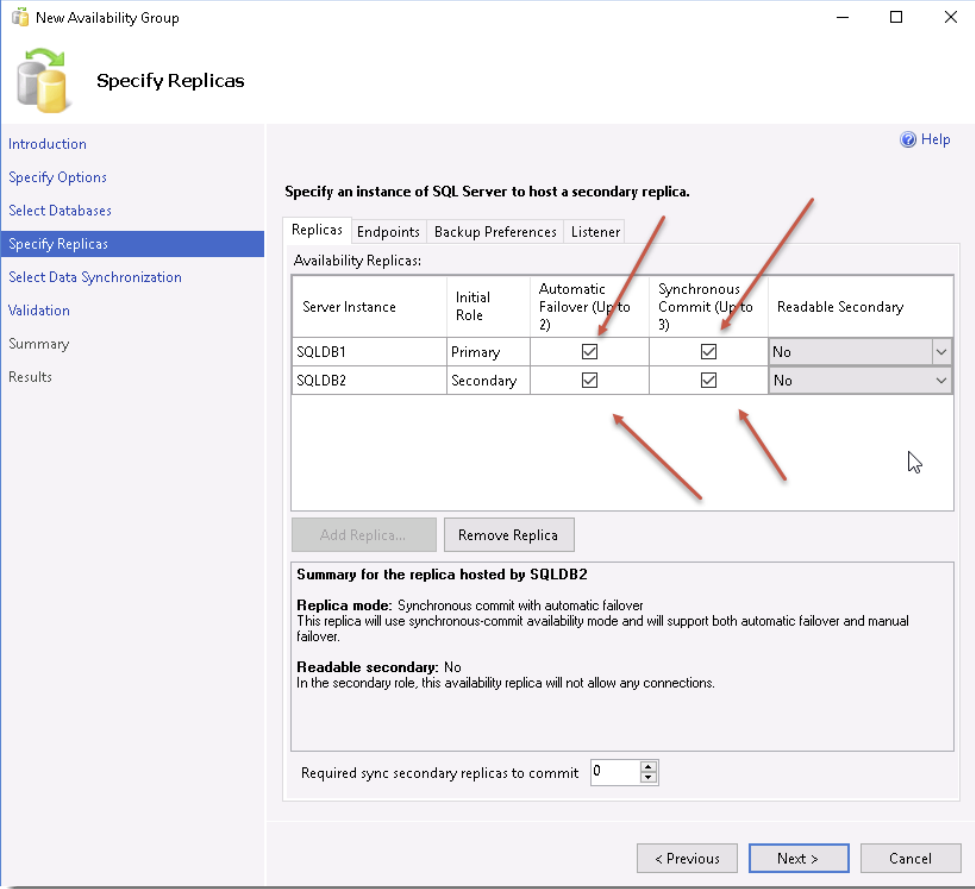
Under the Replicas tab, click the Add Replica button, connect to your second SQL Server, which in this case is SQLDB2, and then click Connect
Select the Automatic Fail over option and Synchronous Commit for both databases.
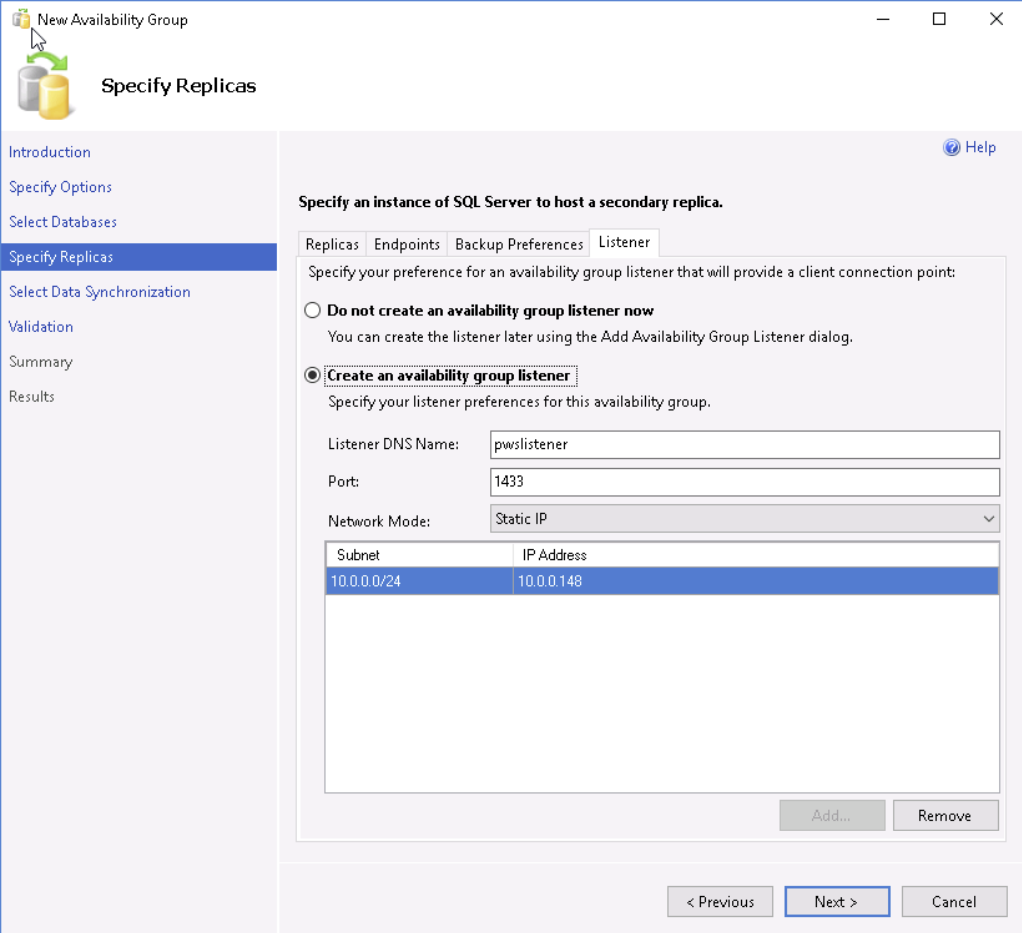
- Under the Listener tab, enable the Create an availability group listener option and enter a DNS name of a server which will provide a client connection point.
This will create a virtual computer object in Active Directory and will also create a Host DNS record for this Active Directory object. Enter the port as 1433 and enter a static IP Address that will be set.
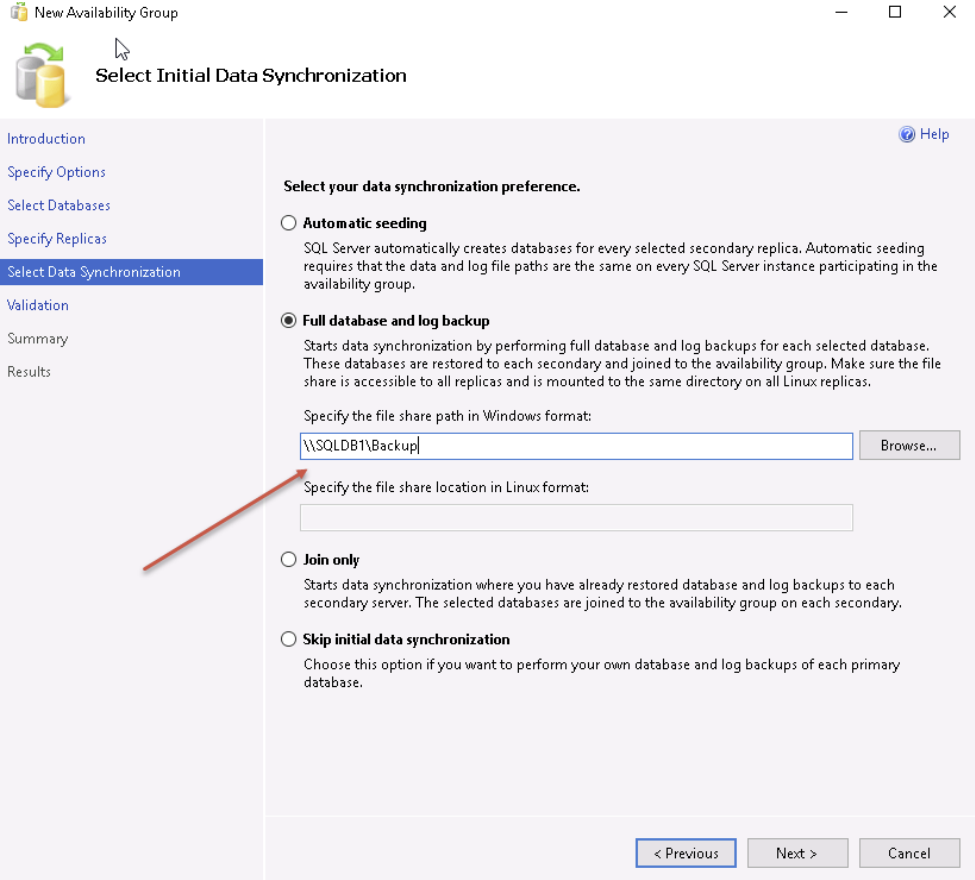
- Enable the Full database and log backup option and set the value of the share on your primary SQL server
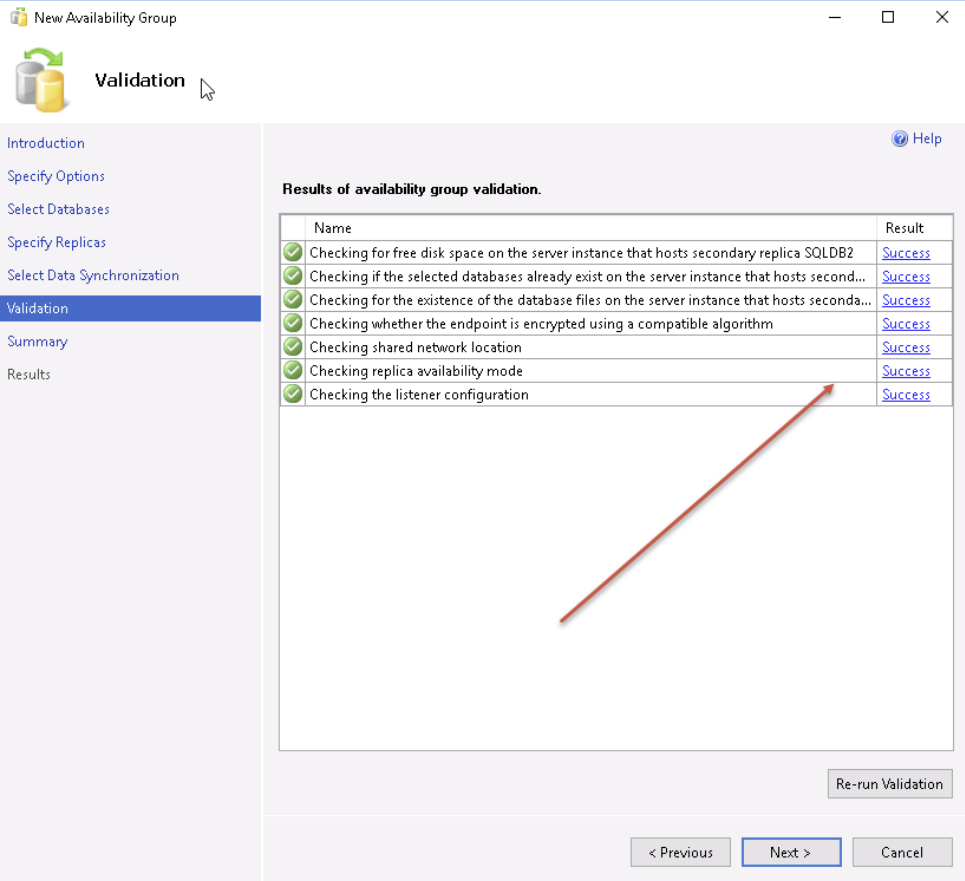
- Ensure all of the tests have succeeded, and click Next
- Review the summary, and click Finish
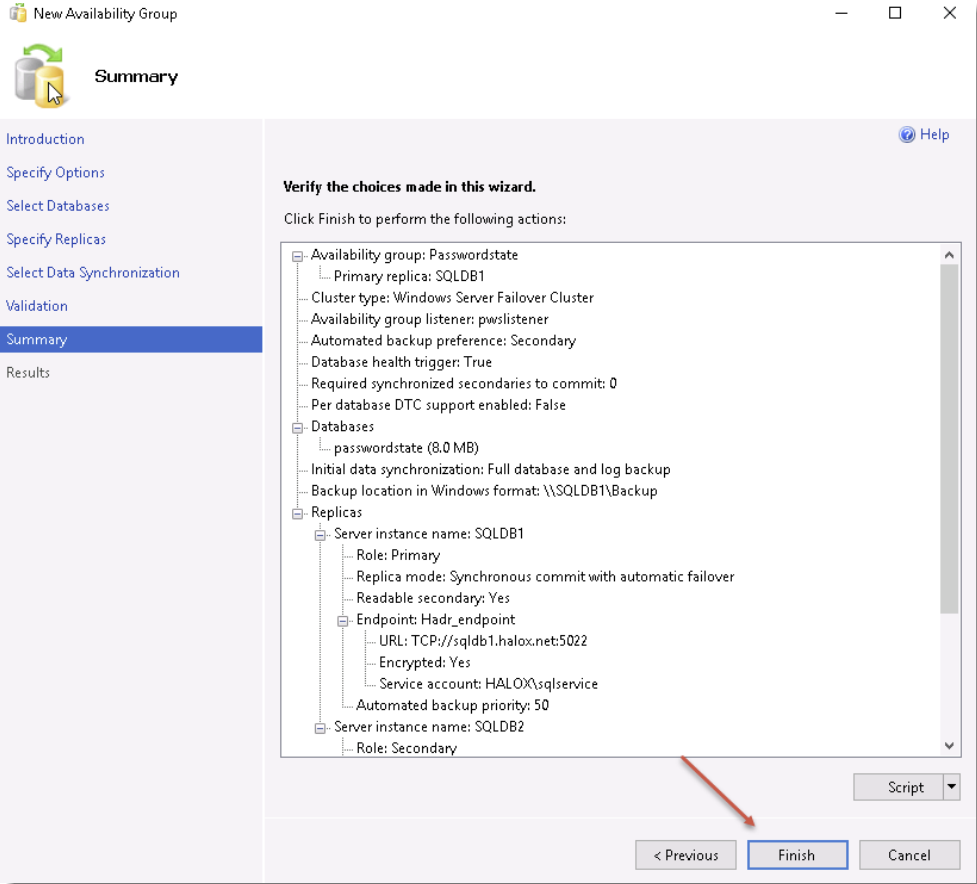
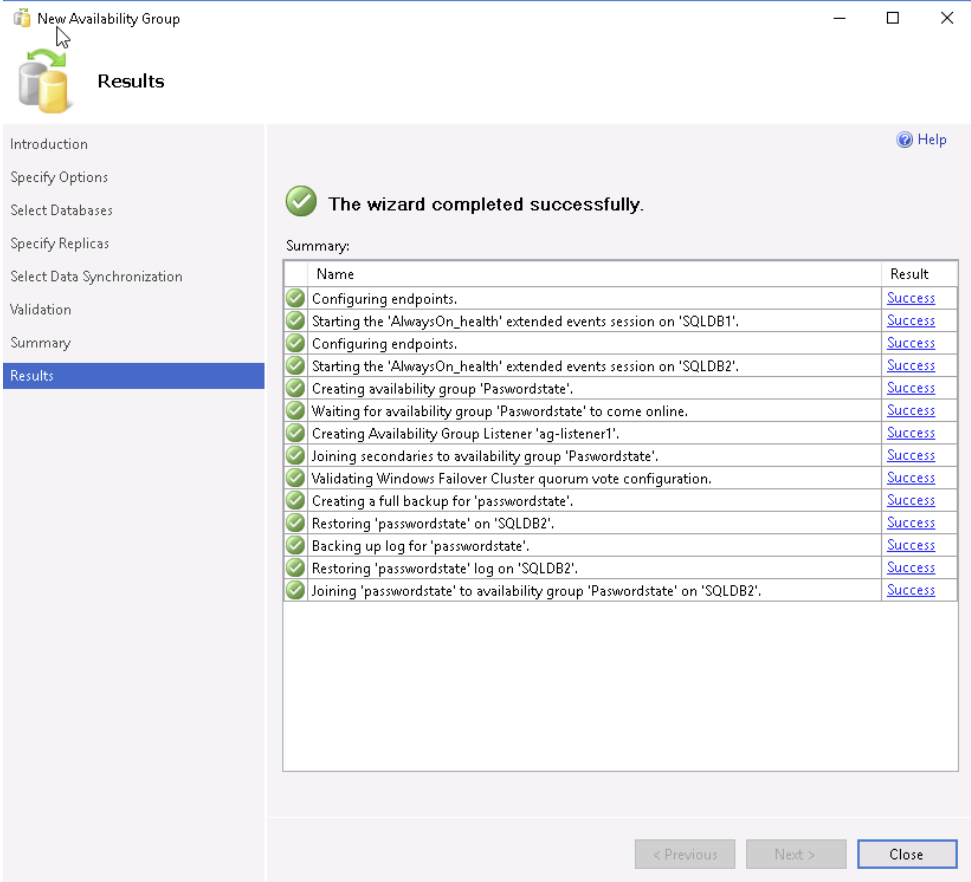
- You should now see a successfully completed wizard
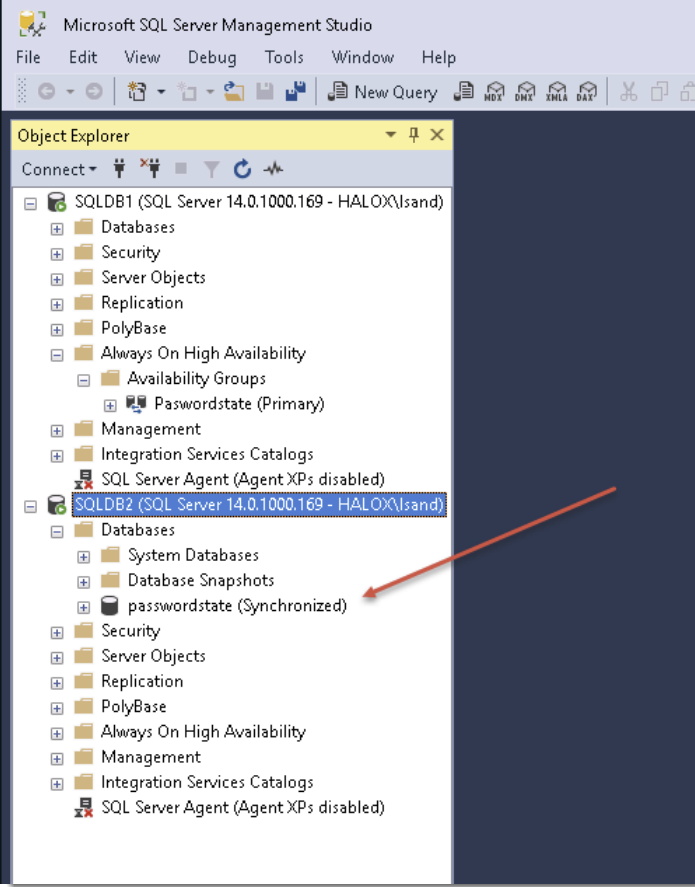
- If you now connect to your secondary server, you will now see the Passwordstate database has been added, and it is synchronizing
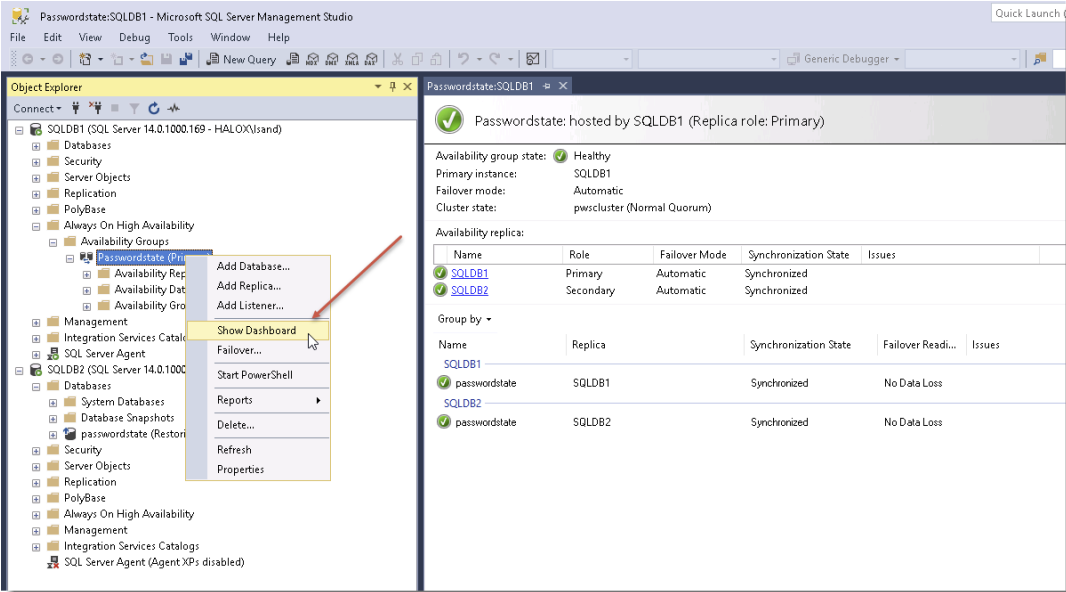
- If you run open the Always On Dashboard, you will also see information about this new Group including its health and the current primary database etc.
Configuring Passwordstate to work with Always On Group
The passwordstate_user account is used to connect the Passwordstate website to the database To ensure Passwordstate can connect correctly, we need to ensure the passwordstate_user account has the same SID on both database servers. This process below will need to be completed to ensure if the databases fail over, then the Passwordstate website will still be accessible
- When connected to your SQLDB1 server, run the following query in SQL Management Studio Tools:
SQL
SELECT SUSER_SID ('passwordstate_user')- Take note of the output and copy it into clipboard
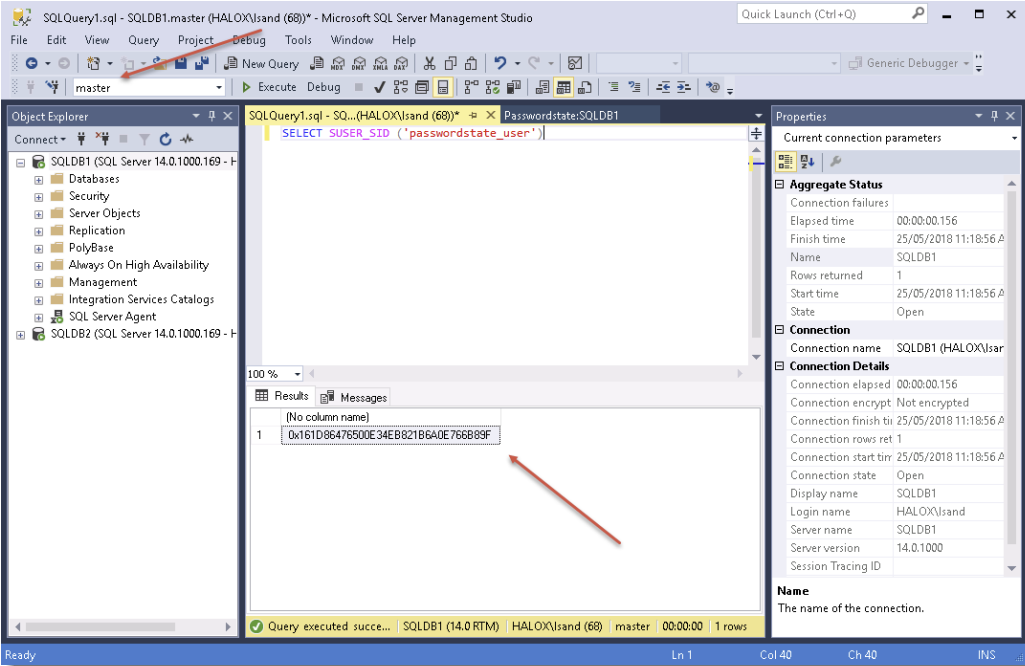
- On your Passwordstate web server open Notepad “As Administrator”, open the c:\inetpub\Passwordstate\web.config file, and take note of the password being used in the connection string

- Next connect to SQLDB2 and run the following command in SQL Management Studio Tools, which will create the passwordstate_user account on this server with the same SID. Ensure you insert the correct SID into this statement that you discovered above. Also ensure the password is set correctly:
SQL
USE [master]
GO
CREATE LOGIN passwordstate_user WITH PASSWORD=N'Welcome01',
SID=0x161D86476500E34EB821B6A0E766B89F, DEFAULT_DATABASE=passwordstate,
DEFAULT_LANGUAGE=[us_english], CHECK_EXPIRATION=OFF, CHECK_POLICY=OFF
GO- Back on your Passwordstate webserver, change the Data Source to be your new listener instead of SQLDB1
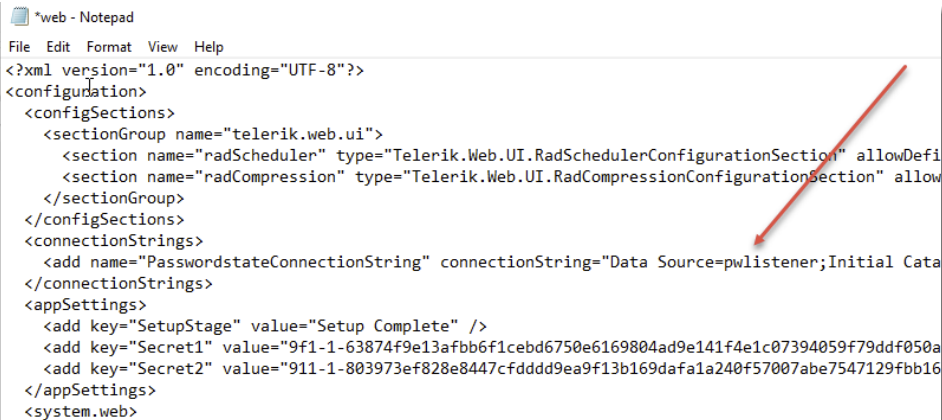
- Save your web.config file and the install is now complete
If your Primary SQL Server is unavailable for any reason, then it will automatically failover to the second server. The time it takes to fail over will depend on network bandwidth and database sizes, but for a small database it is only a few seconds.
Note: When failing over the database, if there is a time delay this can cause the Passwordstate website to generate a connectivity error. In this case you can insert
;Connect Timeout=30into your web.config file and in the connection string as per below example:
