
Moving Passwordstate To A New Database Server
Instructions for moving your Passwordstate database to a new server.
Overview
Please use the following instructions as a guide for moving an existing Passwordstate database to a new database server.
These instructions will assume you have some knowledge for using the Microsoft's SQL Server Management Studio tool, and have appropriate permissions to restore databases.
Backup Process
Passwordstate has a built-in backup feature that can back up your Passwordstate database, but if you have not configured backups within Passwordstate, you can instead perform this process using SQL Management Studio Tools (SMSS).
- Open SMSS and connect to your current database server, using an account that has permissions to perform backups.
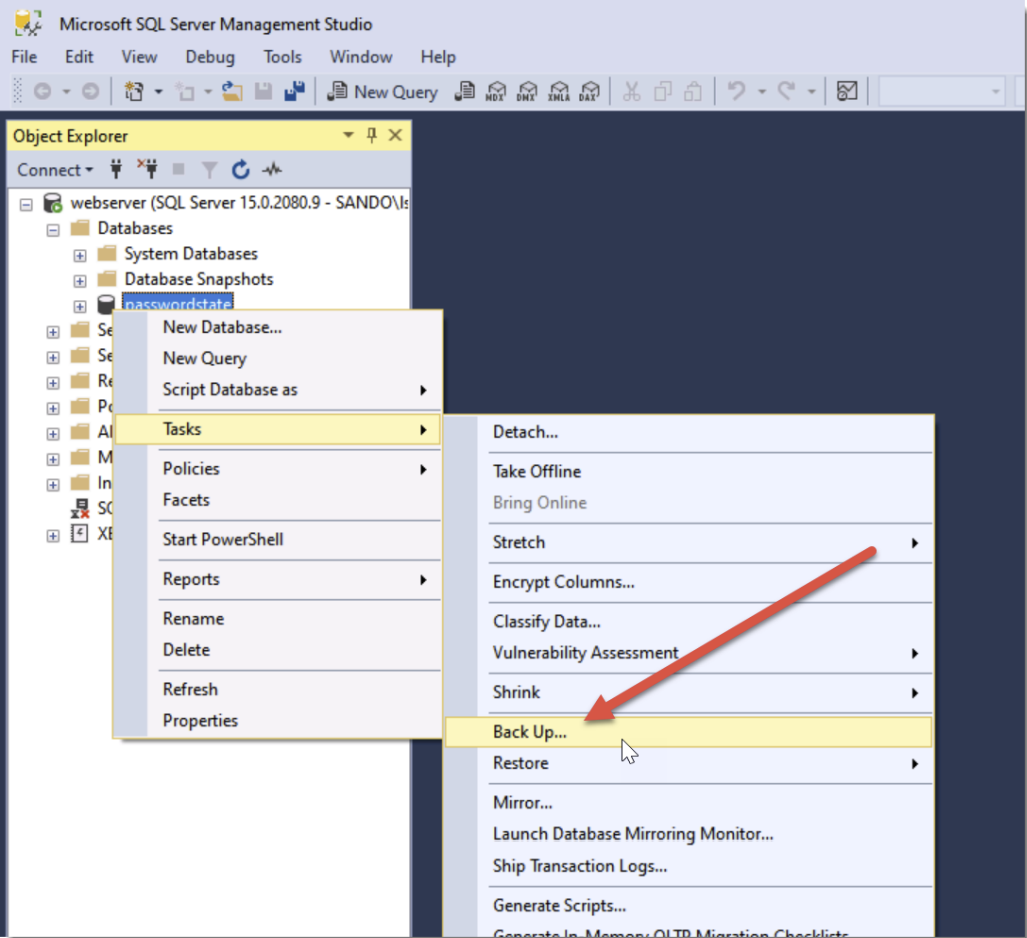
- Expand out the Databases and then right click “Passwordstate”. Select Tasks -> Back Up…
- You can either leave the default path to back the database up to, or choose a custom folder of your choice:
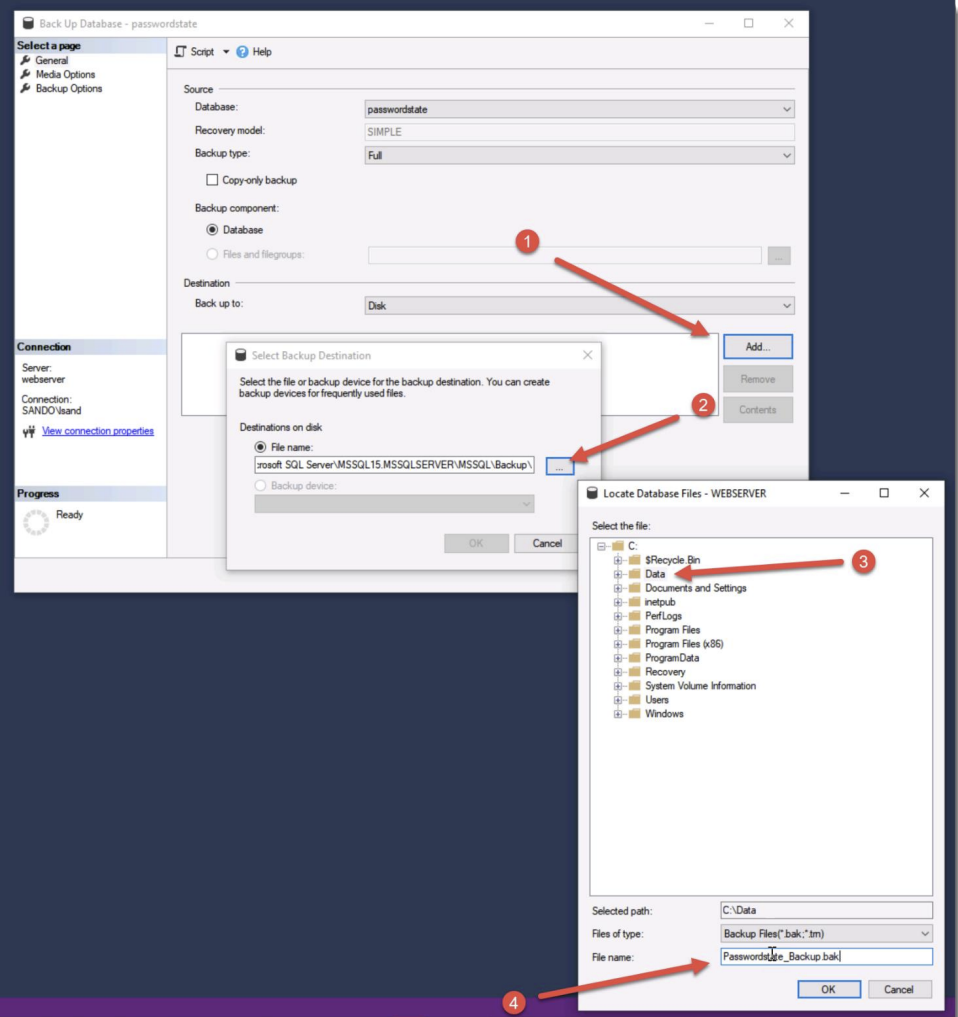
- Ensure you append the File name with .bak.
- Transfer this file to your new SQL Server into a folder of your choice
Note this file is being backed up to your database server, not the computer from where you are launching SMSS from.
Restore Process
Now we will restore the database to a new server where you have already installed Microsoft SQL Server.
- Log into the new database server using an account that has permissions to restore databases.
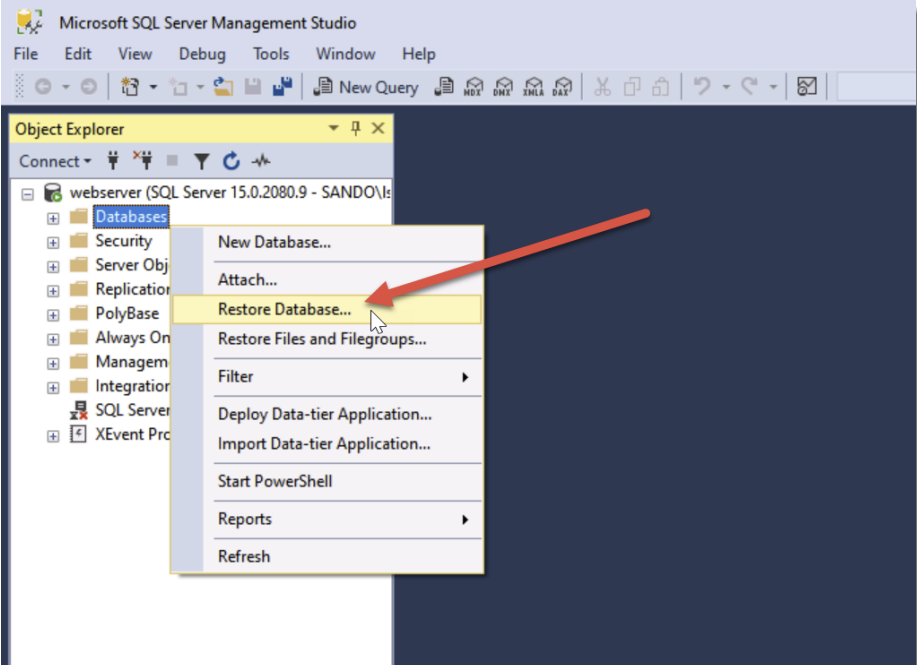
- Right click Databases, and click Restore Database…
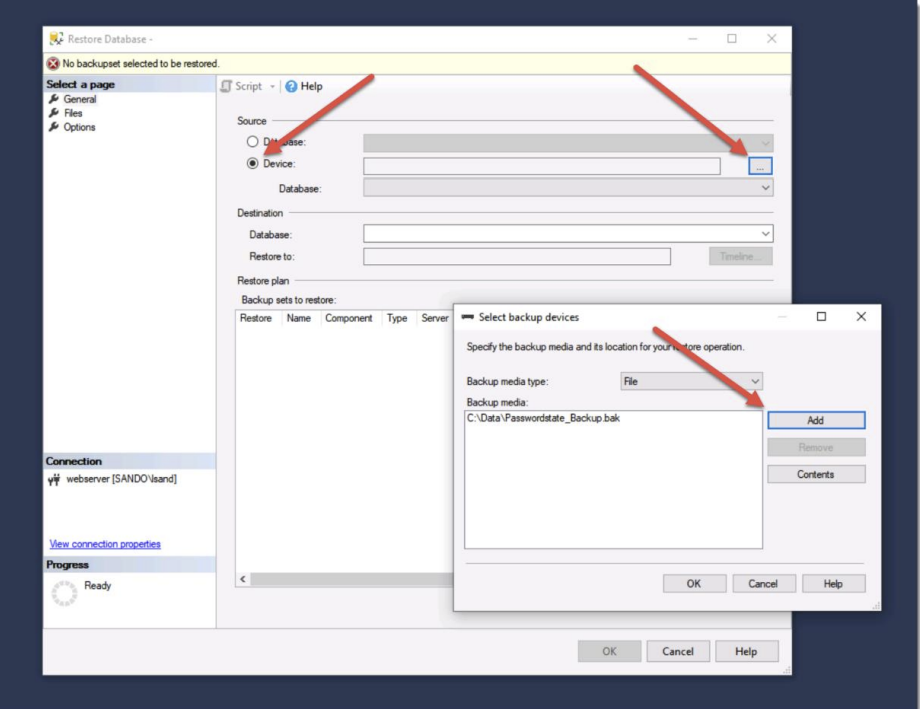
- Select Device, click the three dots and then browse to the .bak file you wish to restore:
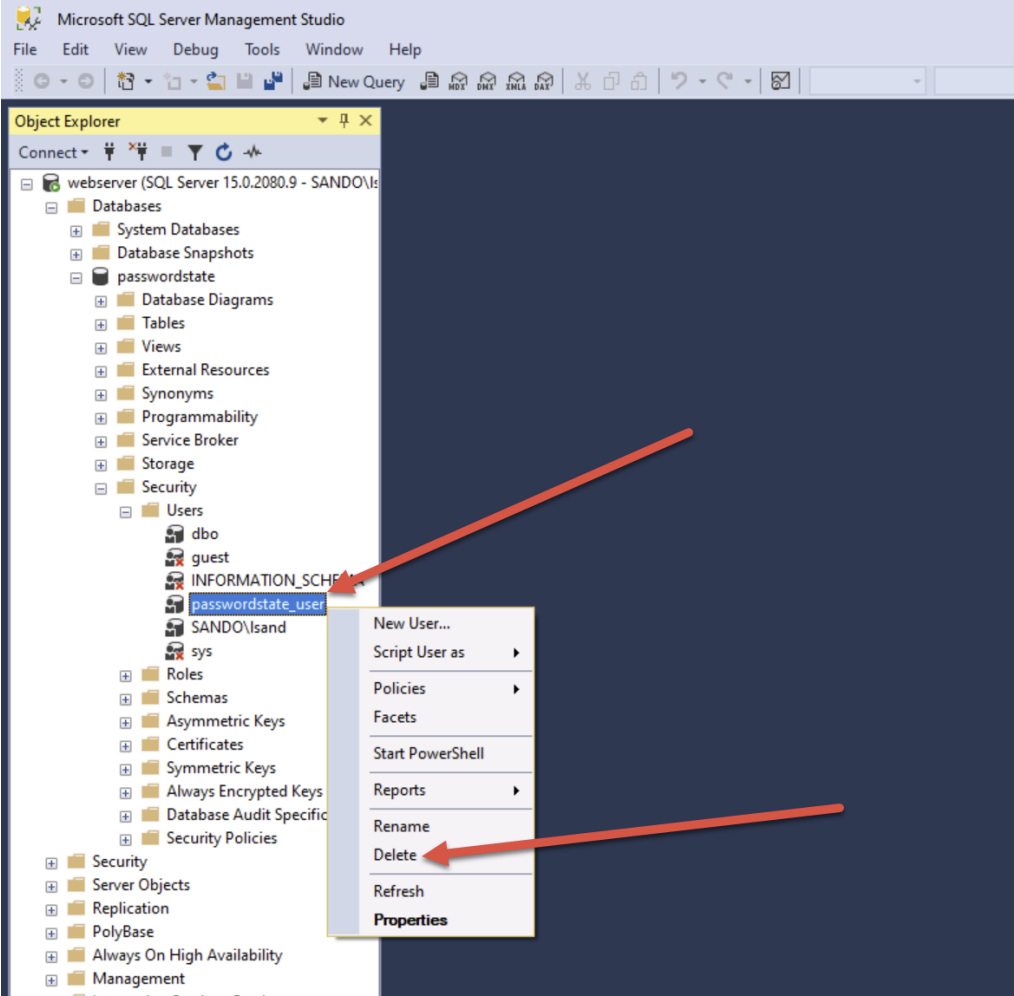
- You should now see your Passwordstate database under the Databases folder. Expand out your Passwordstate database, and then expand out your Security -> Users folder. Right Click and Delete the passwordstate_user:
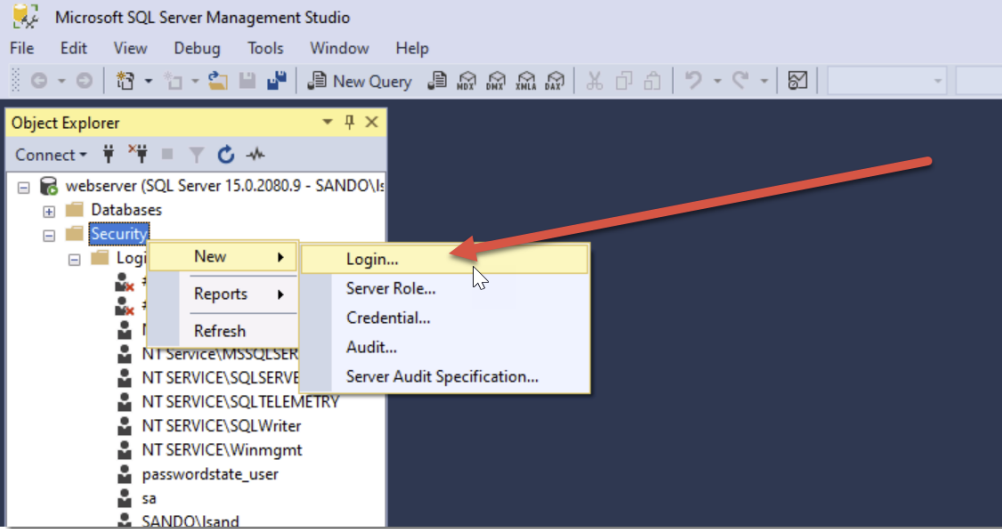
- Now right click Security. Choose New -> Login
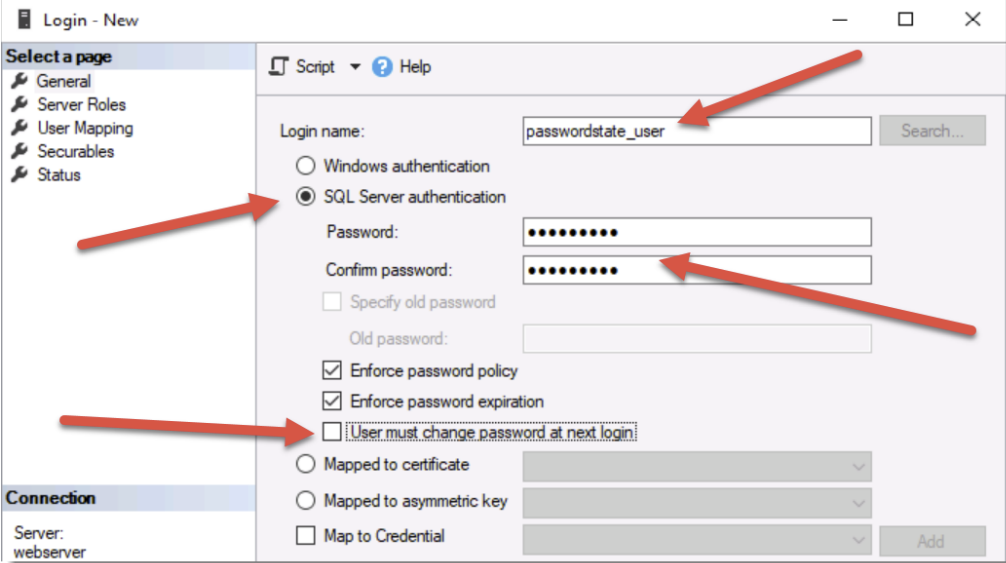
- Set the username as passwordstate_user, tick the SQL Server Authentication option, set a password of your choice and then uncheck the option so the user does not need to change their password upon next login:
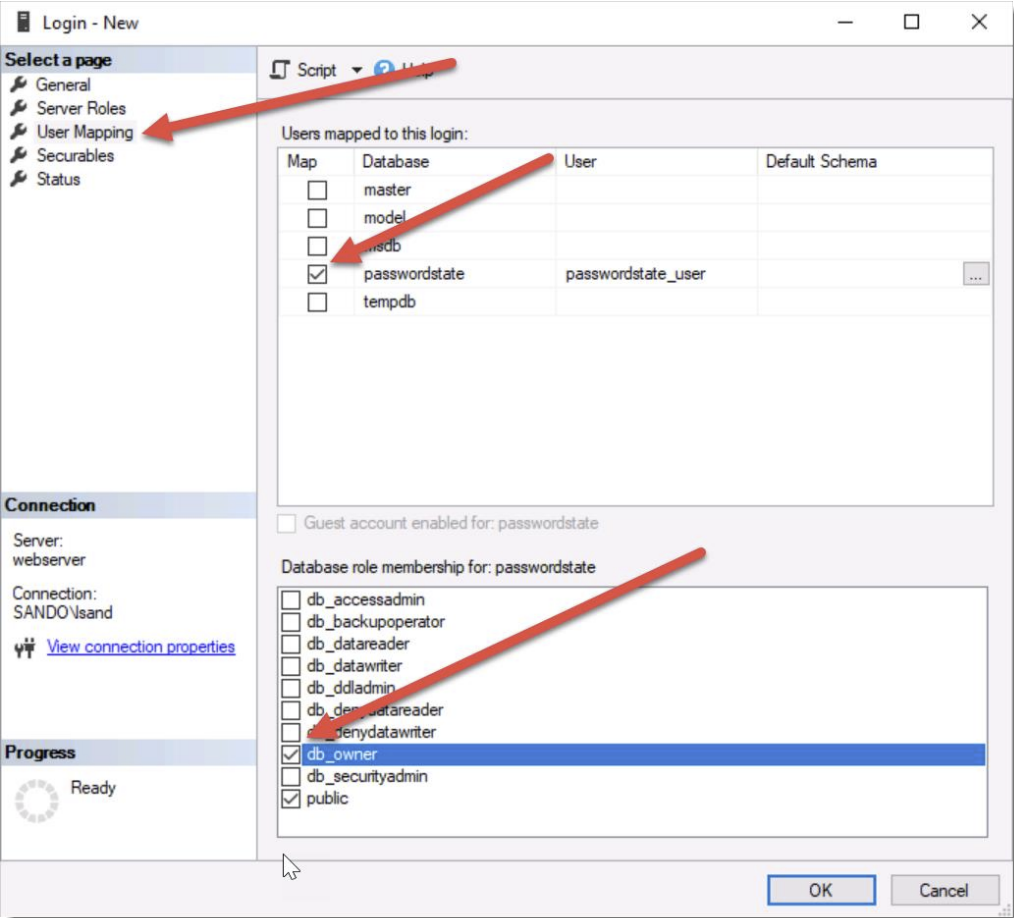
- Under the User Mapping menu, tick the Passwordstate database, and check the db_owner option. Click OK.
Final Changes to your Passwordstate website
Now the Database is migrated to the new SQL server, we need to configure the Passwordstate website to connect it to this new location for the database. We do this by editing the web.config file on the Passwordstate web server.
The web.config file is located in the c:\inetpub\passwordstate folder on your web server. This is the default location, but it’s possible to install Passwordstate in any location of your choice. The following KB Article describes how to find the location of your Passwordstate install folder: How To Find Where Passwordstate Is Installed
When opening the web.config file to modify it, you should see a section called connectionStrings. Inside this tag is 4 pieces of information:
- The database server name (which includes the instance name if it is sqlexpress or a custom instance)
- The database name (by default it’s “passwordstate” unless you change it
- The SQL user which has db_owner rights to the Passwordstate database
- And the password for that SQL user.
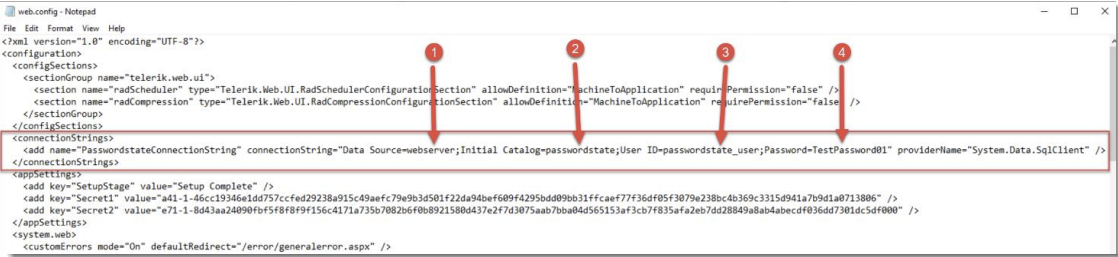
You should update the information in your web.config file to be relevant to your new database server, and click Save. You should now be able to log into your Passwordstate website successfully, and it will be connected to your new database server.
Note: if you cannot see the connectionStrings section in your web.config file, this most likely means it is encrypted for extra security. In this scenario you will need to decrypt it in order to see it in clear text, and make the necessary changes.
More information on decrypting/encrypting the web.config file can be found here: Decrypt/Encrypt Web.config