
Active Directory to Local Account Logins
This process will convert your Active Directory accounts, to Local Accounts - for authentication purposes.
Introduction
This document will describe the steps required to convert Active Directory accounts to Local accounts within Passwordstate. These steps are primarily required due to the way the UserID field is encrypted throughout the database, with the format being different for both types of authentications. These instructions are valid for any version of Passwordstate with build number 9960 or above.
Configure new Local Account with Full Access
- Go to the screen Administration -> Email Templates, and disable all templates
- Now go to the screen Administration -> User Accounts, and create a new Local account for yourself. You can do this by clicking the Add button on this page. When creating the account, ensure you select Internal for the Site Location, and Local Login as per the screenshot below. Your new username can be the same as your domain account if desired. For example, if your domain username is ‘contoso\jbloggs’, simply create your new UserID as ‘jbloggs’
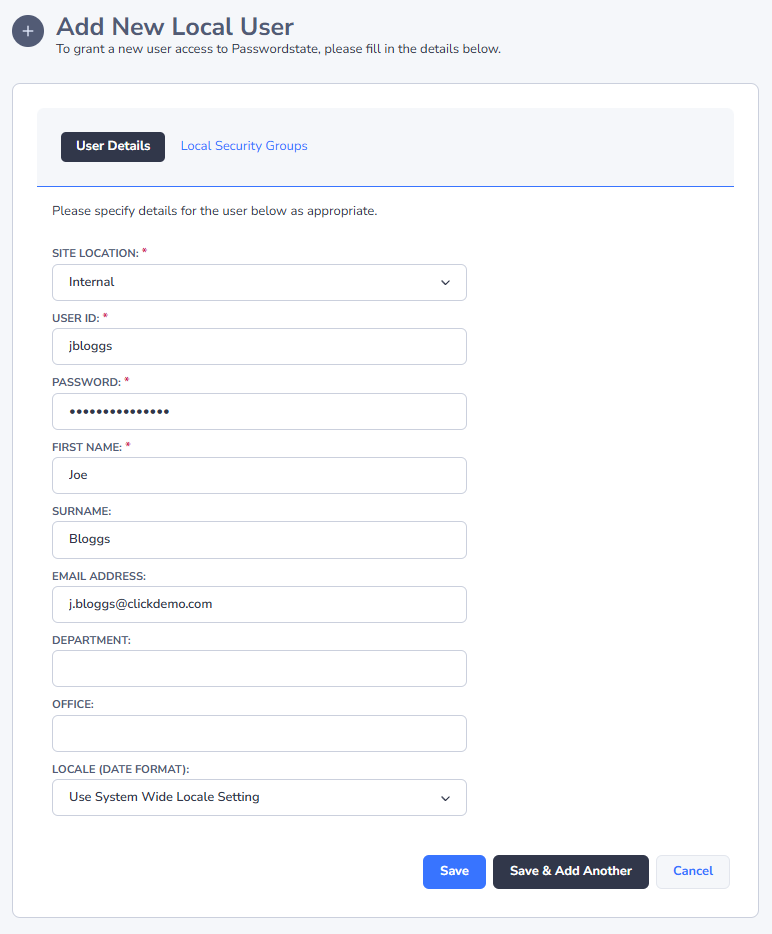
- If you don’t have enough free licenses when creating new accounts, you can disable any one of the existing user accounts as disabled accounts do not consume a license.
- With this new account, go to the screen Administration -> Security Administrators, and grant the account access to all roles – If this option is greyed out, please see this KB Article for more information about how to enable this: Using Emergency Access to Grant new Security Administrator Roles
- Log out of Passwordstate, and then try logging in with this new account. If the login with the new account was successful, then move on to the section below
Cloning Permissions for Users and Security Groups
- Depending on how many available free licenses you have, you may need to disable some users so that you can create new accounts for them in the new domain. Go to the screen Administration -> User Accounts, and disable accounts as required
- On this same User Accounts page, create the new Local accounts you need. You can create these one-by-one, or you can use the ‘Import’ button which will ask you to populate and import a csv file with all your new users.
- While still on the User Accounts screen, click on the ‘Clone User Permissions’ button, and clone permissions from the old Domain Accounts to the new Local Account as appropriate (note this will clone permissions only, not any of the user's Preferences settings). If you have a large number of users, you can use the “Bulk Clone” feature on this page. This requires you to generate and populate a .csv file, and reimport it back into Passwordstate. When cloning permissions for user accounts, there is a feature that can be unlocked which will allow you to move any Private Password Lists from the old user account to the new user account. By default, this feature is not visible and you will need to send an unlock code to Click Studios support to gain access to this feature. To unlock this feature, go to Administration -> Feature Access -> Restricted Features tab, and generate a code for the “When cloning user permissions, allow moving of Private Password Lists from source user to destination user:” restricted feature. Send this unlock code to Click Studios’ Support, and they will reply with an unlock code. Once unlocked, you will see an option when cloning users called “Do you wish to move any Private Password Lists from the Source User to the Destination User”. Setting this to Yes will move any Private Password List across to the new user account as part of the cloning process. The restricted feature can be reversed, if you wish to lock it back down again.
- If you are using Security Groups at all for applying permissions, go to the screen Administration -> Security Groups, add one Local Security Group for each Active Directory Security Group you have in the system. Add the new Local Accounts into the appropriate Security Groups.
- Clone permissions between the old Active Directory security groups to the new Local security groups by clicking the ‘Clone Permissions’ button on this page.
- Once you have finished adding the new users, cloning permissions and changing ownership of Private Lists, you can delete the old user accounts and the old security groups from the system.
- Go to the Screen Administration -> Email Templates, and enable all templates
- Restart the Passwordstate Windows Service a move onto the section below
Final Considerations
If you have followed this guide because you are decommissioning On Premise Active Directory completely from your network, please consider these options below. If you need advice on any of these options, you are welcome to log a support call with Click Studios tech support through this page: https://www.clickstudios.com.au/support.aspx
- Screen Administration -> System Settings -> Email, Proxy & Syslog servers. Possibly your email server settings may need changing
- Screen Administration -> Backups and Upgrades. If you’re using this feature, you may need to change the account here which is used to perform the backups
- If you are using SAML for authentication into Passwordstate, this feature works by matching a specific attribute on the account in Passwordstate with the account in the SAML provider. You will need to ensure that attribute on the new local accounts you have added in as part of this guide are exactly the same as they were on the old domain account. An example of this matching attribute is “Email Address”. Users will not be able to login with their new local accounts, if these attributes are not set correctly.
- Are you using Passwordstate to manage privileged Active Directory accounts on your network? You can find this out by running the report called “Show Passwords configured for resets and their dependencies” from the page Administration -> Reporting. If you have any password records set up for this feature, you should delete these records.
- Delete any Active Directory account or host discovery jobs you have set up under Administration -> Account and Host Discovery
- Delete any privileged accounts set up under Administration -> Privileged Account Credentials that are referencing the old domain
- Delete the domain itself from the Administration -> Active Directory Domains page.